- Getting Started
- Administration Guide
-
User Guide
- An Introduction to Wyn Enterprise
- Document Portal for End Users
- Data Governance and Modeling
- Working with Resources
- Working with Reports
-
Working with Dashboards
- Dashboard Designer
- Selecting a Dataset
- Data Attributes
- Dashboard Scenarios
- Dashboard Templates
- Component Templates
- 3D Scene
- Explorer
- Visualization Wizard
- Data Analysis and Interactivity
- Dashboard Appearance
- Preview Dashboard
- Export Dashboard
- Dashboard Lite Viewer
- Using Dashboard Designer
- Animating Dashboard Components
- Document Binder
- Dashboard Insights
- Add a New Page in Dashboard Designer
- View and Manage Documents
- Understanding Wyn Analytical Expressions
- Section 508 Compliance
- Subscribe to RSS Feed for Wyn Builds Site
- Developer Guide
Set Relative Date
You can set the relative date while filtering the data on the dashboard. Listed below are a few use cases for this.
Case 1: Set the Date Range slicer's default value to the current year.
Example: Suppose you want to create an Annual Dashboard adding a Date Range Slicer to analyze data by year. This slicer will work with Year mode and you can use the current year as the default value. If you view this dashboard during 2023 then it will use 2023 as the default value.
Take a Pivot Table and bind it to the data.
Take a Date Range Slicer and bind the Year field. On the Inspector tab, click the Default Value textbox.
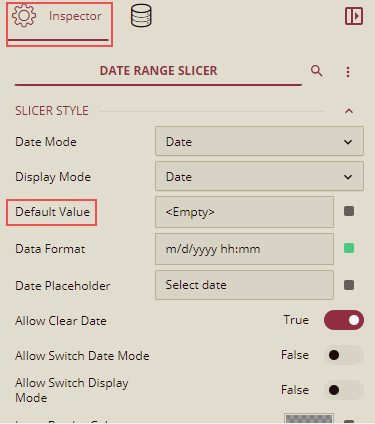
Set Default Value dialog box is displayed.
Select the option Relative Date from the Value Type dropdown list. In the Default Value field, you can see the options for the Date Unit to select from the current Year, Quarter, Month, Week, and Day as shown below.
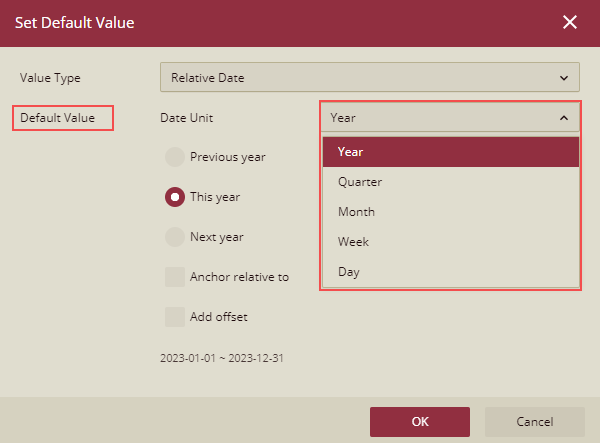
In this case, we will select the date unit as Year from the dropdown list, and by default This Year option will be selected.
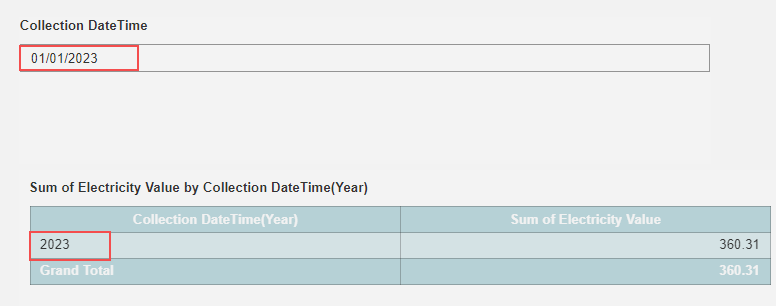
Click OK and preview the dashboard. By default, the current year will be selected and the data will be displayed for the current year.
Case 2: Set the Date Range slicer's default value to the current year-month.
Example: Suppose you want to create an Annual Dashboard, by adding a Date Range Slicer to analyze data by year and month. This slicer will work with Year and Month mode and you can use the current year and month as the default value. If you view it on 2023/09/01--2023/09/31 then it will use 2023-09 as the default value.
Take a Pivot Table and bind it to the data.
Take a Date Range Slicer and bind the DateTime field. On the Inspector tab, click the Default Value textbox.
Set Default Value dialog box is displayed.
Select the option Relative Date from the Value Type dropdown list list. In the Default Value field, you can see the options for the Date Unit to select from the current Year, Quarter, Month, Week, and Day as shown below.
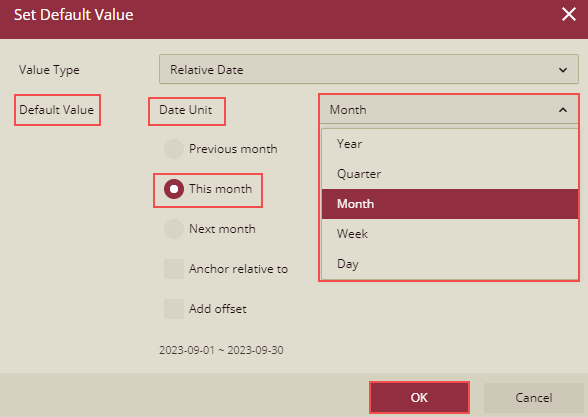
In this case, we will select the date unit as Month from the dropdown list, and by default, the This Month option will be selected.
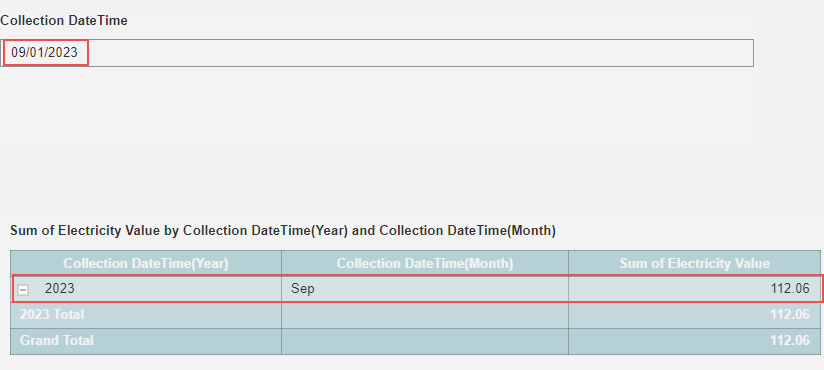
Click OK and preview the dashboard. By default, the current month-year will be selected and the data will be displayed for the current year and month.
Case 3: Show the data for the current year of the month in the dashboard by default, without any slicer.
Example: Suppose you want to create a Monthly Dashboard to show the data of the current month of the year only, and there is no Slicer to change the month. When you view this dashboard during a certain month it will set this month as the default value.
Take a Pivot Table and bind it to the data.
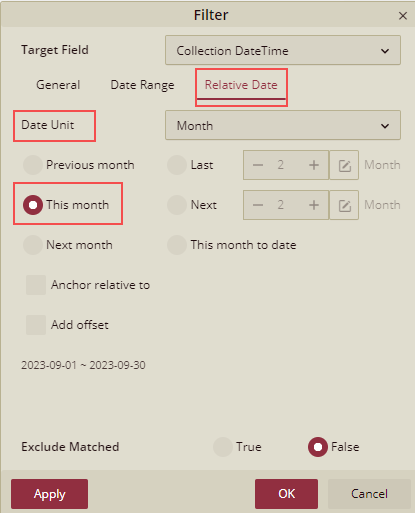
Add a filter to the dashboard to show the data for the current month. Click the option Relative Date tab. From the Date Unit select from the Year, Quarter, Month, Week, Day, Hour, Minute, and Second.
In this scenario, we have selected Year.

Similarly, add a filter for Month.
Preview the dashboard. By default, the current month-year will be selected and the data will be displayed for the current year and month.

Case 4: Set the relative date for the Relative Date slicer.
Example: Suppose you want to create a dashboard, by adding a Relative Date Slicer to analyze last year's data.
Take the Data Table and bind it to the data.
Take a Relative Date Slicer and bind it to the data. The relative date component can only bind one date field, and the setting items related to adding relative dates will appear below after binding the field.
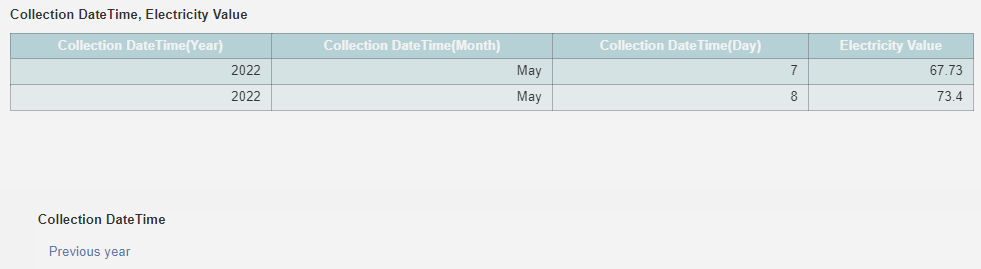
To add a relative date option, click +Add Relative Date and select Previous Year from the list.
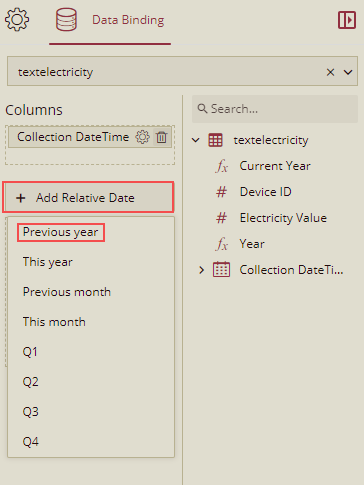
By default the option Previous Year will be selected in the setting area below.
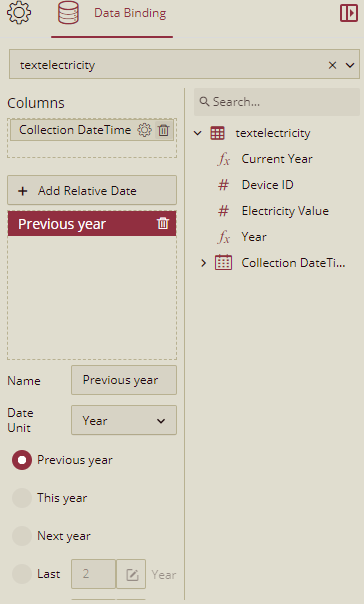
Name: This is the name relative to the date. You can rename it, and click the blank space after renaming to preview the effect in the editing area.
Date Unit: Select the appropriate date unit for the relative dates you added. When you select a different date unit, the options below will also change with it. If you select Year as an example, the following options are displayed: Previous Year, This Year, Next Year, Last n Years, Next Year, This year to date, Anchor relative to, and Add offset.
Preview the dashboard. The dashboard will show the last year's data.