- Getting Started
- Administration Guide
-
User Guide
- An Introduction to Wyn Enterprise
- Document Portal for End Users
- Data Governance and Modeling
- Working with Resources
- Working with Reports
-
Working with Dashboards
- Dashboard Designer
- Selecting a Dataset
- Data Attributes
- Dashboard Scenarios
- Dashboard Templates
- Component Templates
- 3D Scene
- Explorer
- Visualization Wizard
- Data Analysis and Interactivity
- Dashboard Appearance
- Preview Dashboard
- Export Dashboard
- Dashboard Lite Viewer
- Using Dashboard Designer
- Animating Dashboard Components
- Document Binder
- Dashboard Insights
- Add a New Page in Dashboard Designer
- View and Manage Documents
- Understanding Wyn Analytical Expressions
- Section 508 Compliance
- Subscribe to RSS Feed for Wyn Builds Site
- Developer Guide
Reference Line
Reference lines are static lines drawn at user-defined values on the axes. They help analyze data against some reference value. For example, you can add a reference line to find the products that did not meet the sales target.
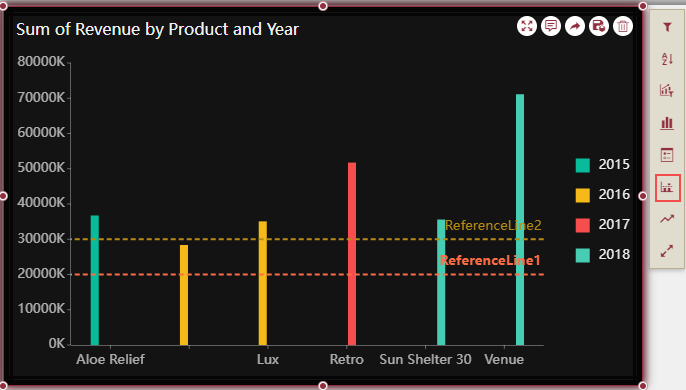
A reference line can be added either at a constant value or at an aggregated value on the axis, such as max, min, average, median, and count. In Wyn Dashboards, you can add as many reference lines as you want on a scenario.
Note: You can add reference lines in all the chart scenarios except for TreeMap, Sunburst, and Map.
Adding a Reference Line
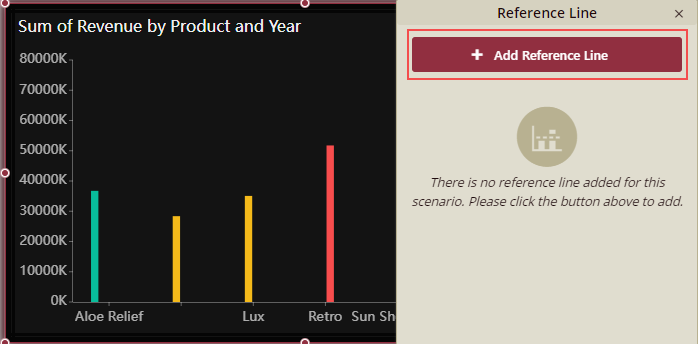
Select the dashboard scenario for which you want to add a reference line. Note that an Action Bar automatically appears on the right of the scenario.
From the Action Bar, select Reference Line.

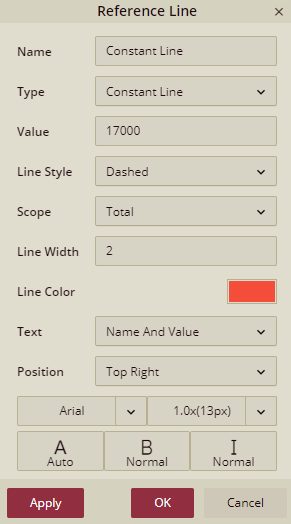
In the Reference Line dialog that appears, click Add Reference Line as shown below.
Specify the name for the reference line. By default, its name is set to Constant Line.

Set the Type to a suitable option from the list. The Type field determines whether you want to display the reference line at a constant value or at an aggregated value. Since we are adding a reference line at a constant value of 170000, choose Type to 'Constant Line'.
Specify the value at which you want to display the reference line. For example, if you want a horizontal line at point 170000, then set the Value to '170000'.
Choose the Line Style for the reference line from the list. You can set the line style to either 'Solid' or 'Dashed'.
Customize the appearance of the reference line by specifying its Line Width and Line Color. For example, set the Line Width and Line Color to 2 and Red, respectively. You can also set the color of the reference line to 'Auto'.
Select the label name of the reference line from the dropdown list Text. You can choose any of the following options from the list: 'None', 'Name, or 'Name And Value'.
Select the position where you want to place the label name of the reference line from the dropdown list Position. You can choose any of the following options from the list: 'Top Right', 'Top Left', 'Top Center', 'Bottom Right', 'Bottom Left', and 'Bottom Center'. You can customize the font of the label name like font type, font size, bold, and Auto.
Note: When the option Auto is selected for the field Text, the color of the label text will be consistent with the color of the reference line.
Click Apply and then OK to save the settings.