- Getting Started
-
Administration Guide
-
Get Started with Administering Wyn Enterprise
- System Requirements
- Installing on Windows
- Installing on Linux
- Installing using Docker
- License Wyn Enterprise
- Deploying with HTTPS
- Deploying with Reverse Proxy
- Deploying to Azure App Service (AAS)
- Deploying to Azure Kubernetes Service (AKS)
- Deploying to AKS using Helm Chart
- Deploying to Local Kubernetes
- Deploying to Kubernetes Cluster using Helm Chart
- Deploying as a Virtual Directory or Sub-Application
-
Deploying to Amazon ECS
- Deploying to Amazon EKS using Helm Charts
- Deploying in a Distributed Environment
- Migration from ActiveReports Server 12
- Upgrade Wyn Enterprise to Latest Version
- Logging on to the Administrator Portal
- Ports in Firewall
- Configuration Settings
- Account Management
- Security Management
- System Management
- Document Management
- How To and Troubleshooting
-
Get Started with Administering Wyn Enterprise
- User Guide
- Developer Guide
Deploying to Amazon ECS
Amazon Elastic Container Service (ECS) is a container orchestration service designed for efficiently deploying, managing, and scaling containerized applications, such as Wyn Enterprise. Leveraging ECS for Wyn Enterprise deployment streamlines the process, enabling seamless launch, monitoring, and scaling across diverse compute options, while seamlessly integrating with various AWS services. For further insights into the capabilities and additional resources of Amazon ECS, refer to the Amazon Elastic Container Service documentation.
This help article outlines the steps involved in deploying Wyn Enterprise to Amazon Elastic Container Service (ECS).
Before deploying the Wyn Enterprise in the Amazon Elastic Container Service (ECS) ensure the following;
Your existing database server is accessible within the AWS Cloud Service.
You have an active AWS Account.
Deploying Wyn Enterprise in ECS is a 7-step process as described below,
Step 1 - Create VPC
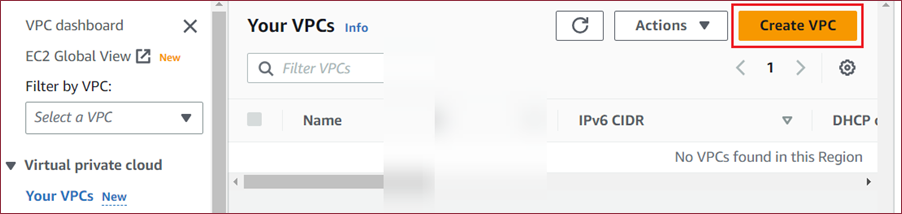
To create a Virtual Private Cloud (VPC), follow the below instructions,
Open this link and click the Create VPC button.
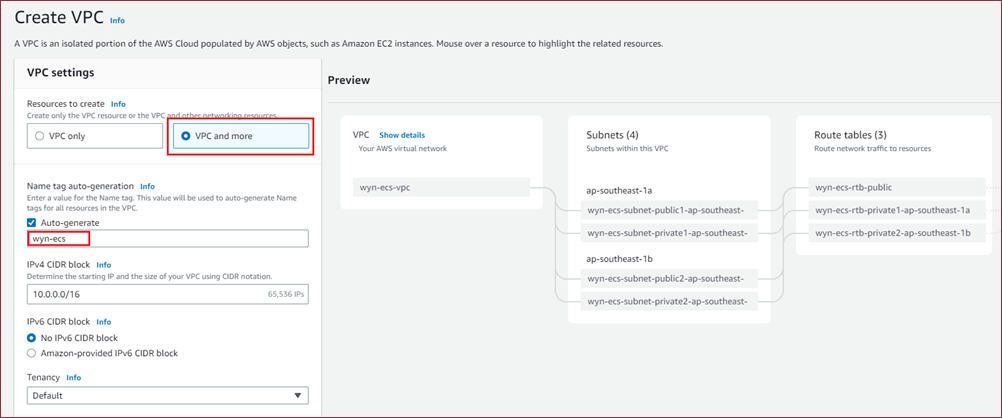
On the Create VPC page, select the VPC and More option, add a name for the VPC or check the Auto-generate option, and keep the default settings for other options like IPv4 CIDR block, IPv6 CIDR block, Tenancy, etc. Click Create VPC to finish.
Step 2 - Create Security Group
To create the security group, follow the below instructions,
Open this link and click the Create security group button.

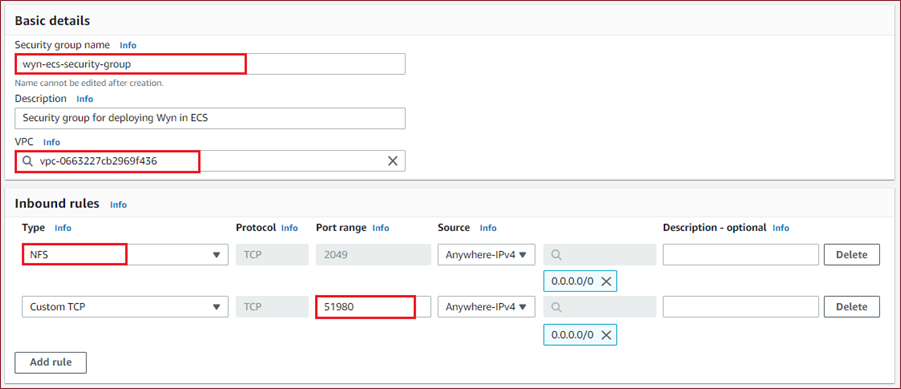
Add the basic details like the Security group name and Description, and select the VPC created in Step 1.
Then, add a new inbound rule to access the NFS service and a new inbound rule for port 51980. Click the Create Security group option to finish.
Step 3 - Create File System
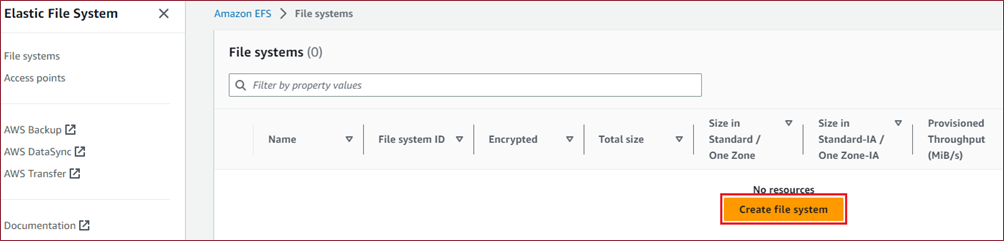
To persist data, you need to mount volumes to external storage. To accomplish this, let's proceed with creating an Amazon Elastic File System (EFS) resource by following the below instructions.
Open this link and click the Create file system button.
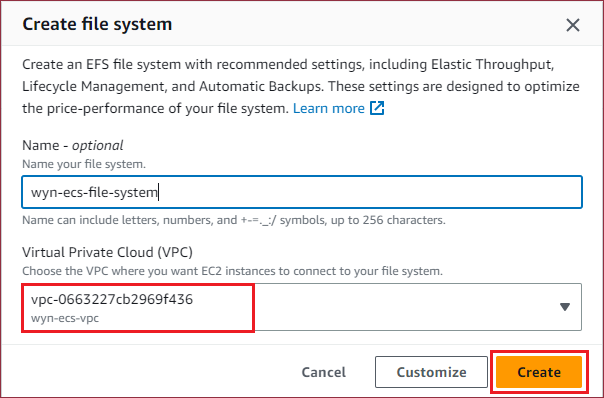
On the Create file system popup, add a name to your file system in the Name your file system input box, select the VPC created in Step 1, and click the Create button.
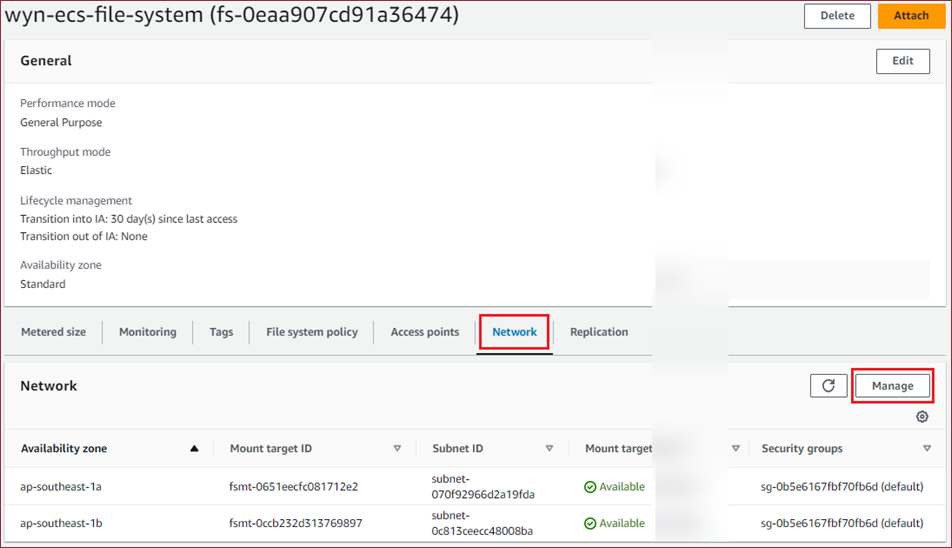
Once the file system is created, navigate to the Network tab and select the Manage button.
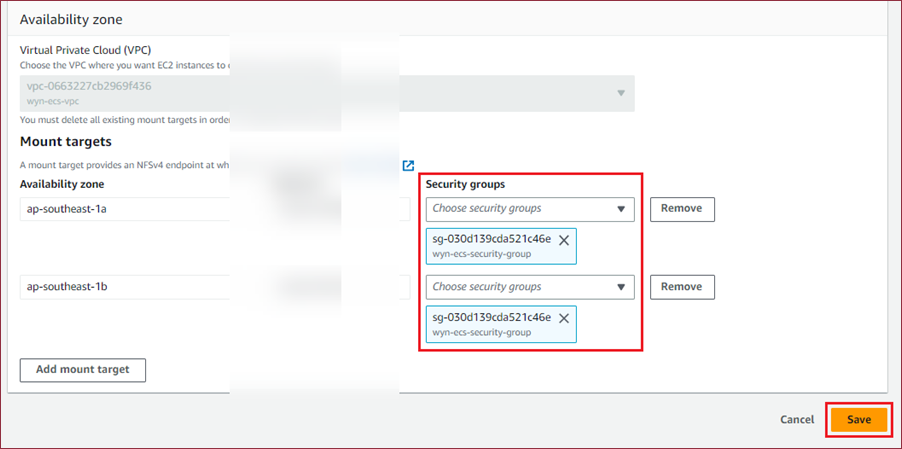
On the Network tab, change the security group(s) to the one created in Step 2 using the Choose security groups dropdown and click the Save button.
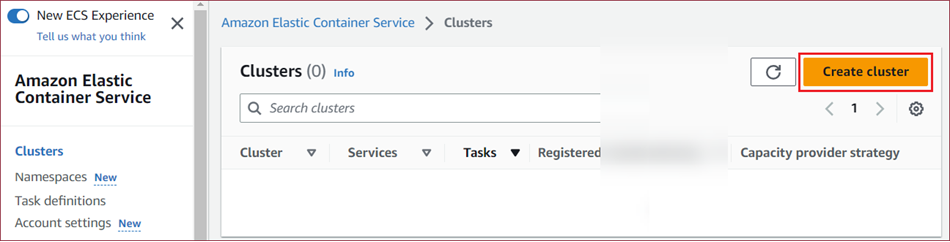
Step 4 - Create Cluster
Open this link and click the Create cluster button.
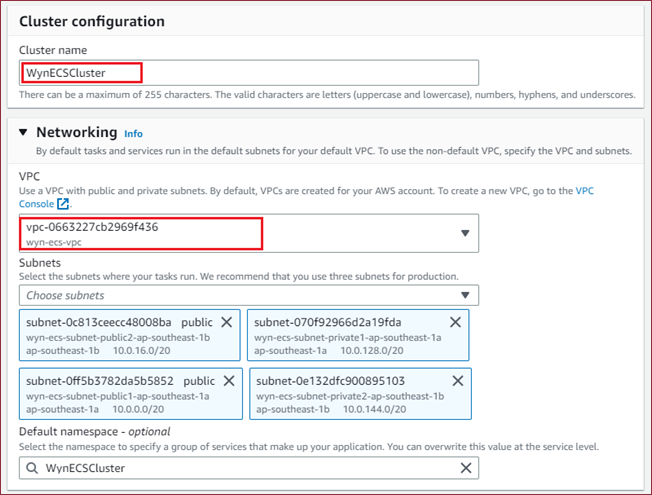
Add a name for the cluster in the Cluster name input box of the Cluster configuration section, select the VPC created in Step 1 from the VPC input box of the Networking section, and keep the default settings for other options. Click the Create button to finish.
Step 5 - Create Docker Image Pulling Secret
Note: In case you are using a public docker repository, skip this step.
To create the docker image pulling secret, follow the below instructions,
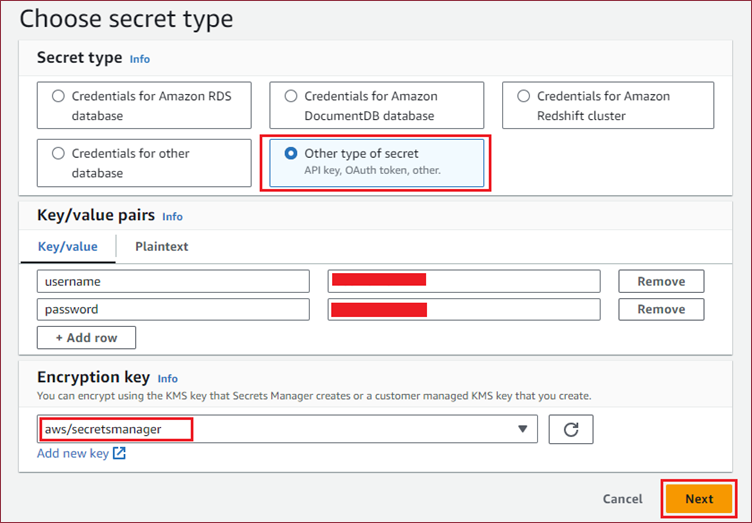
Open the secret manager and click the Store a new secret button.

On the Choose secret type page, choose the Other type of secret under the Secret type section, add the username and password in the Key/value pairs section, and click the Next button.
Add a name descriptive name for the secret in the Secret name input box and click the Next button. Keep the default settings for other options and click the Store button to store the secret.
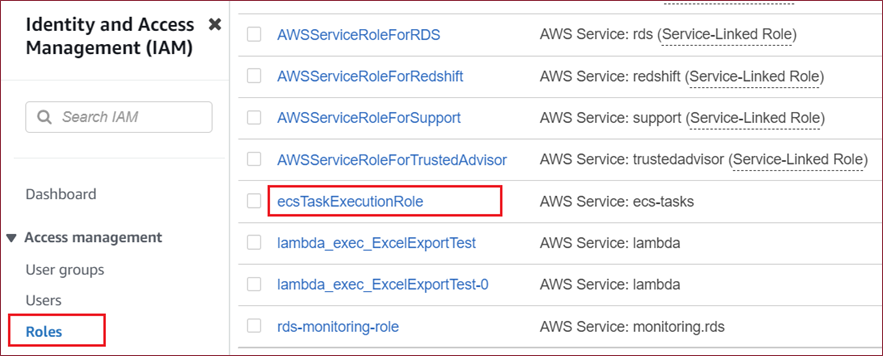
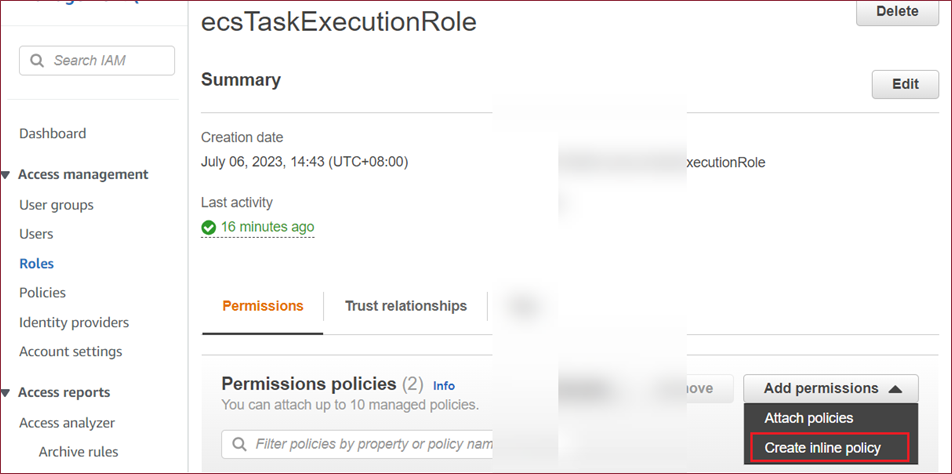
Now, navigate to the IAM (Identity and Access Management) page and select the Task Execution Role under Access Management >> Roles.
Click the Add Permissions button and select the Create inline policy option.
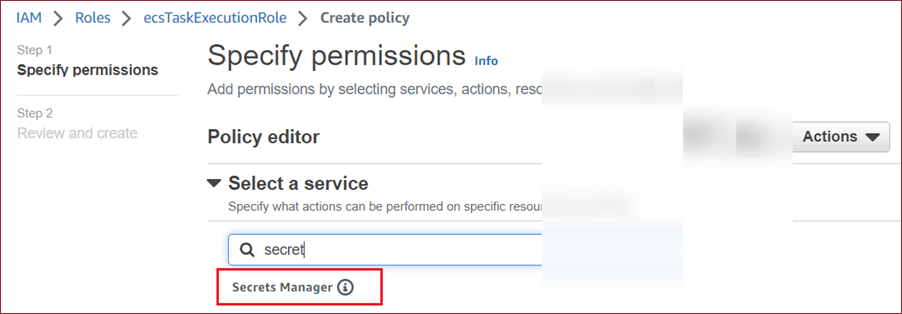
On Step 1 of the Create Policy page, search for the secret keyword using the search box and click the Secret Managers option.
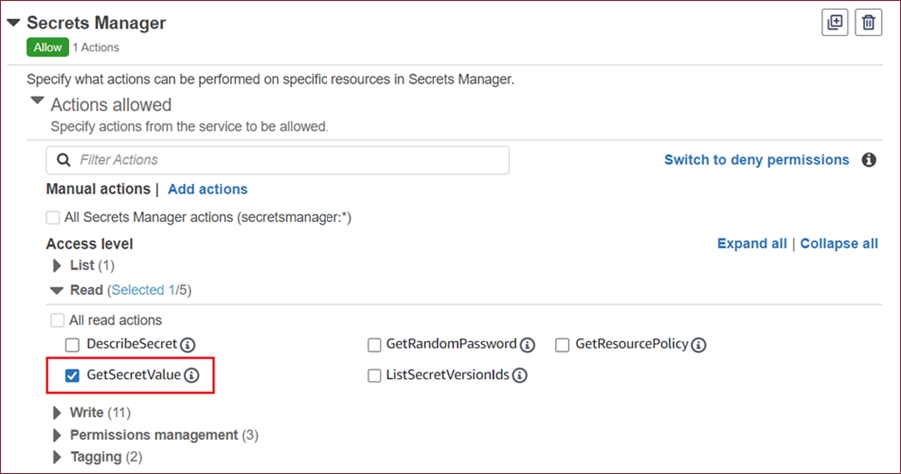
Select the GetSecretValue option using the checkbox from Actions allowed >> Manual Actions >> Access Level >> Read.
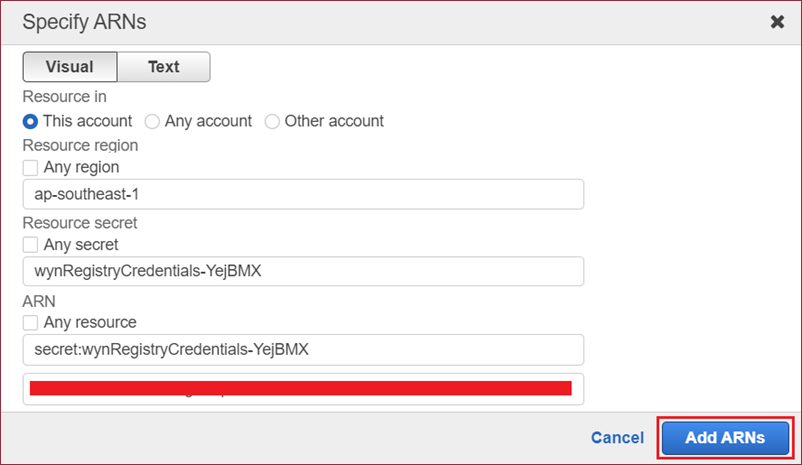
Under the Resources section, click the Add Arn link.

Paste the ARN (Amazon Resource Name) of the previously created secret at the bottom of the dialog box, then click on Add ARNs.
Click Next to proceed, enter the desired policy name, and then click the Create policy button.
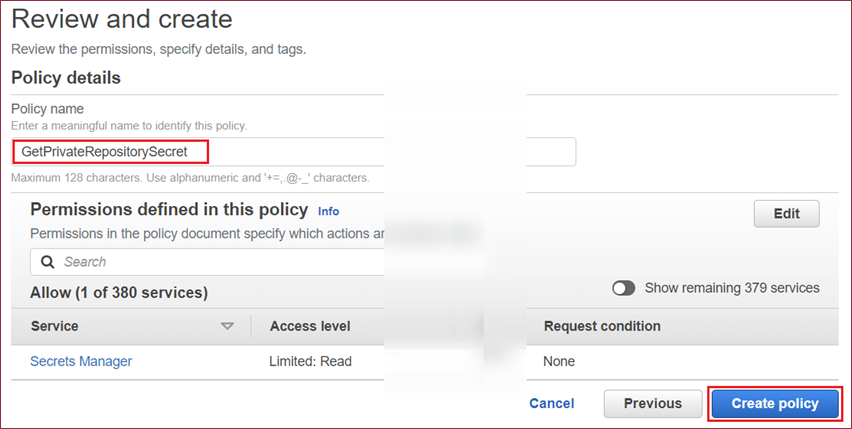
The newly created permission policy will appear in the Permission policies section.

Step 6 - Create Task Definition
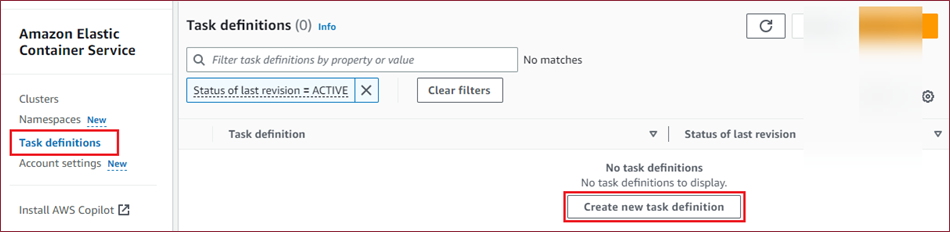
To create the task definition, follow the below instructions.
Open this link and click the Create new task definition button.
Fill in the Task definition family input box with the family name, provide the Docker image URI, and set up the port mapping for port 51980.
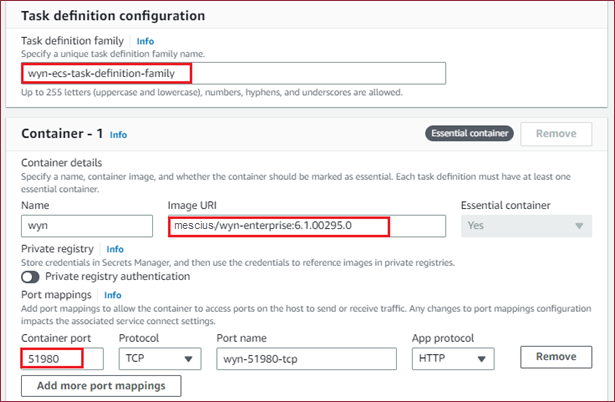
Note: When using a private docker repository, you need to use the AWS Secrets Manager to create a docker image pulling secret. See the Private registry authentication for tasks - Amazon ECS help article for more information.
Add the environment variables for the database settings, and click Next.
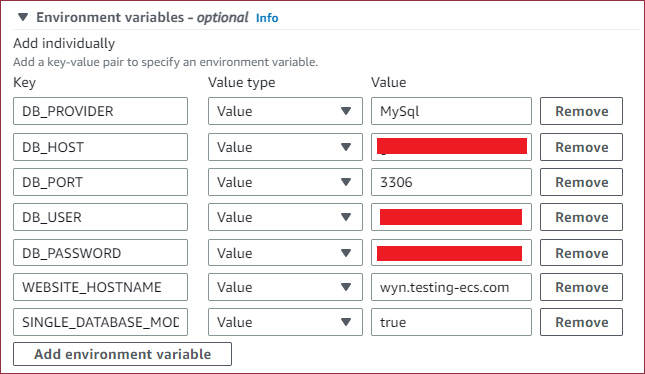
Note: The environment variable WEBSITE_HOSTNAME is mandatory for the license registration and it can take up any value, however, the value should be unique for your deployed environments. And, if you wish to use only one database to store all the data, add the environment variable SINGLE_DATABASE_MODE and set its value to True.
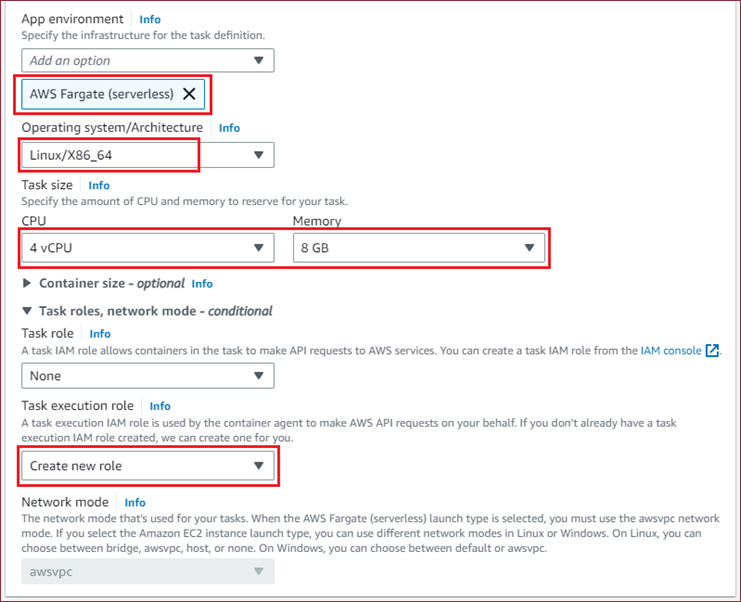
Configure the environment using the settings shown in the image below.
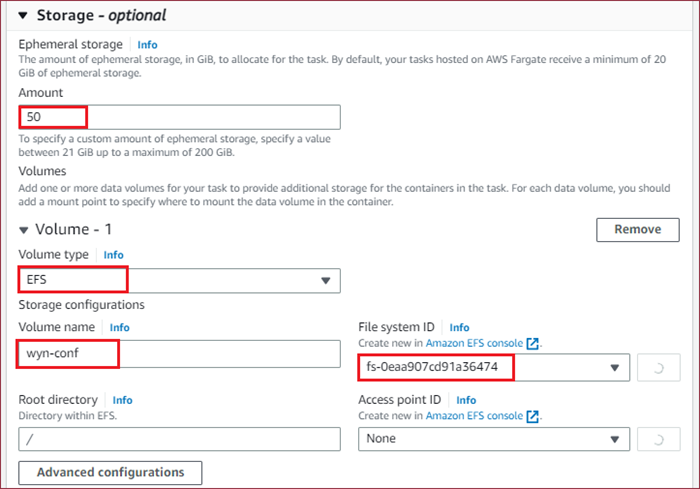
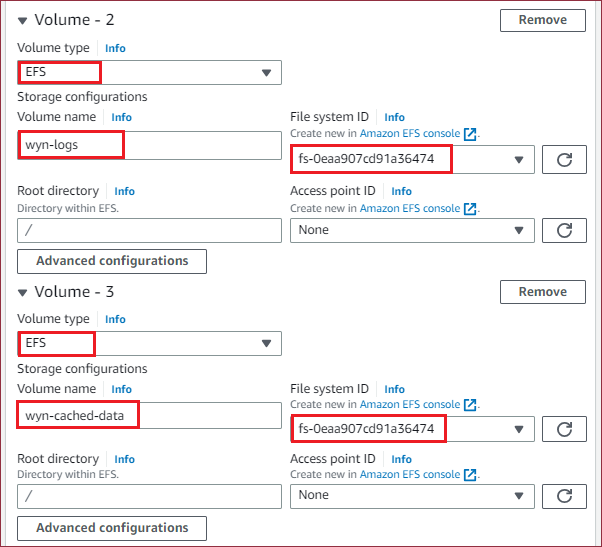
Under the Storage section, set the Amount to 50 and add three volumes wyn-conf, wyn-logs, and wyn-cached-data.
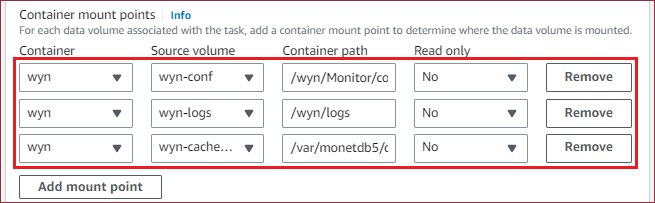
Add three mount points with wyn-conf mounted to /wyn/Monitor/conf, wyn-logs mounted to /wyn/logs, wyn-cached-data mounted to /var/monetdb5/dbfarm and click Next.
Review the task definition and click the Create button.
Step 7 - Create Task
To create an ECS task, follow the below instructions,
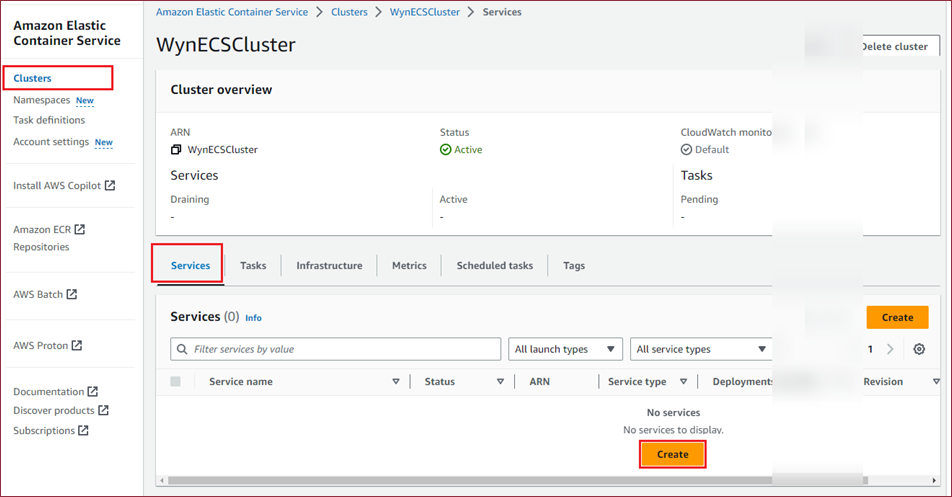
Navigate to Clusters and select the cluster created earlier. Then, select the Services tab and click the Create button.
Under the Compute configuration section, select FARGATE from the Capacity provider dropdown and 1.4.0 from the Platform version dropdown.

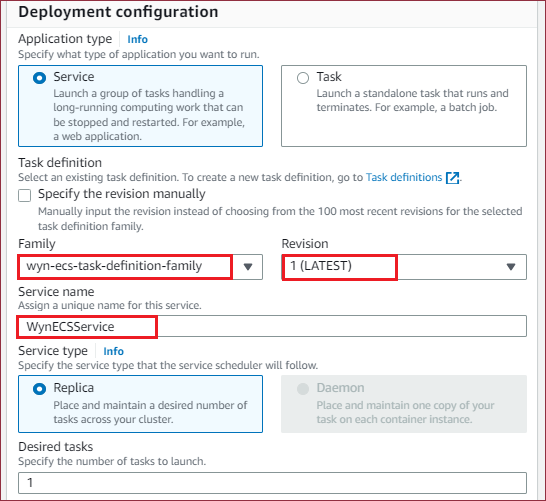
Under the Deployment configuration section, select the Task Definition Family created by you earlier and the latest version from the Revision dropdown.
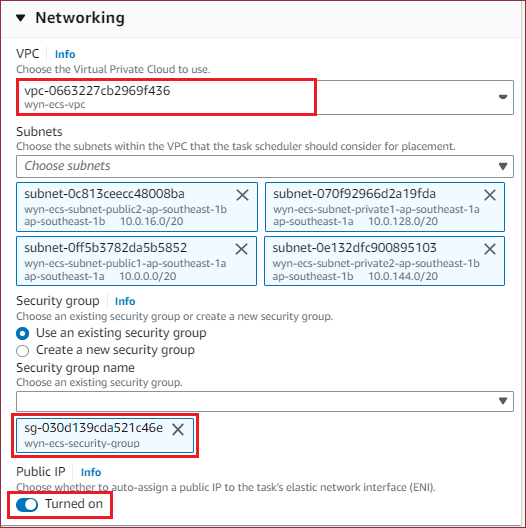
Under the Networking section, select the VPC and security group created in the earlier steps, and then, click Create.
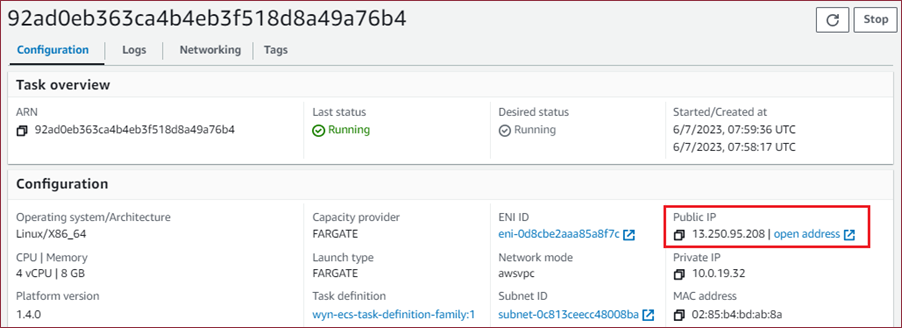
Once the service is created, navigate to the Tasks tab, and wait for the task status to change to Running. Subsequently, click on the task id.
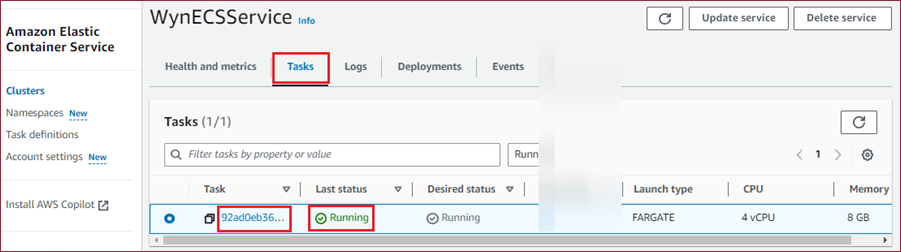
Copy the public IP address of the task. You can now access Wyn Enterprise using the URL http://{task_public_ip}:51980.