- Getting Started
- Administration Guide
-
User Guide
- An Introduction to Wyn Enterprise
- Document Portal for End Users
- Data Governance and Modeling
- Working with Resources
- Working with Reports
- Working with Dashboards
- View and Manage Documents
- Understanding Wyn Analytical Expressions
- Section 508 Compliance
- Subscribe to RSS Feed for Wyn Builds Site
- Developer Guide
Add an Intervals Column
You can generate an interval column based on a numeric column (database column or calculated column) or a database text column.
When you generate an interval column based on a numeric column (database column or calculated column) and a specified interval, the calculated new column is numeric type.
When you generate an interval column from a database text column and a specified classification, the calculated new column is text type.
Add an Intervals Column when a numeric column is selected
Follow the below steps to add an Intervals column to the entity.
From the Entities panel on the left, select an entity. In this example, we have selected the 'FactInternetSales' entity.
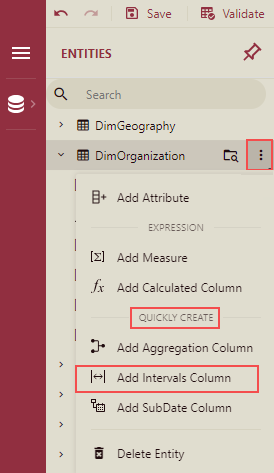
Click the More button and then select the Add Intervals Column option from the list under the Quickly Create category.
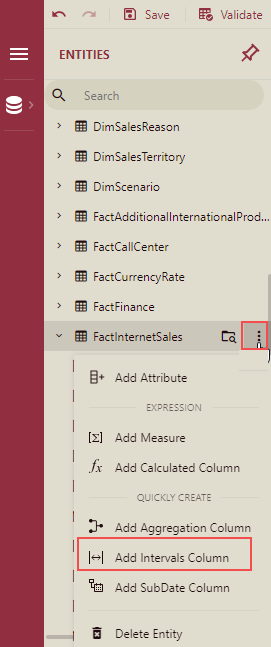
Add Intervals Column dialog box is displayed.
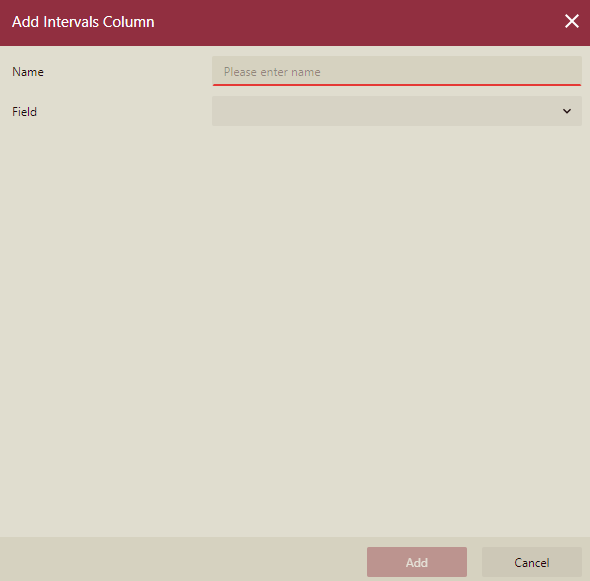
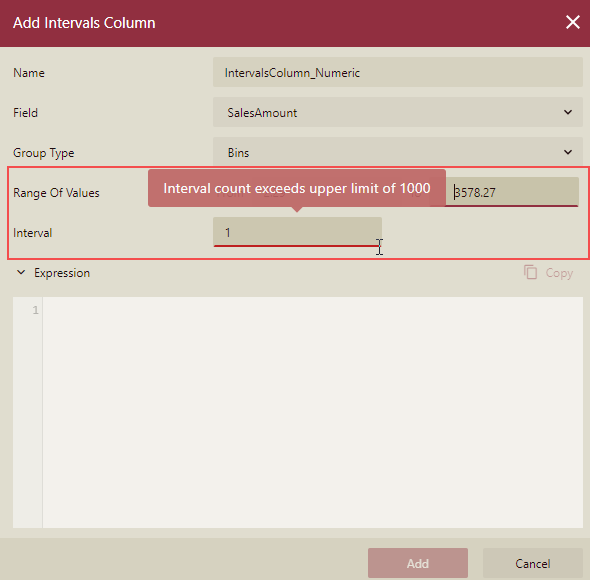
Enter the Name of the new intervals column.
Select the numeric column from the current table from the Field dropdown list.
The Group Type option is displayed as Custom by default, and five intervals are displayed by default according to the maximum and minimum values of the column in the database. The WAX expression is also autogenerated.
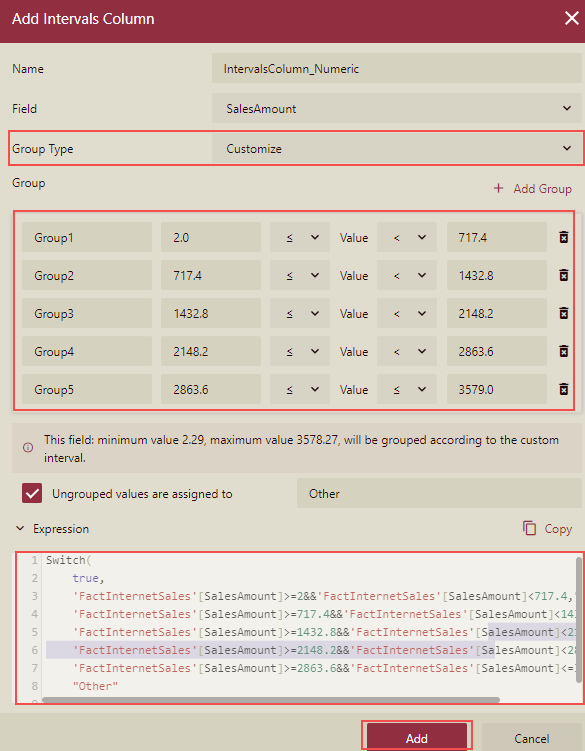
You can manually add or delete the intervals, edit the intervals range, and modify the interval's name. If there is no data in the database, it will display No data found in the Group panel, and users can still add groups manually. If there is only one row of data, only one category will be displayed by default.
Note: The start value of the first set of intervals and the end value of the last set of intervals can be left blank, but if a group has neither a start value nor an end value, the group is invalid and you need to delete the group to save it.
If you change the Group Type to Bins, the Interval text box is displayed, and the default value is the difference between the maximum and minimum values currently listed in the database divided by five. If the database has no data or only one piece of data, the default value of the interval is empty, and the user can manually modify the interval size.
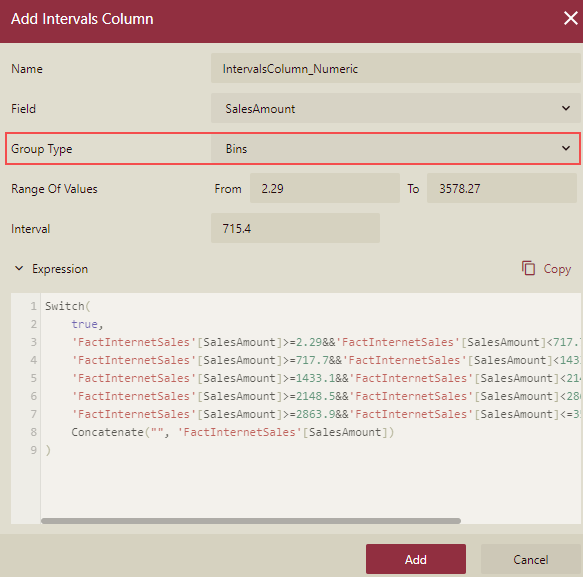
The maximum range of a single interval should be less than 1000. Otherwise, an error message Interval count exceeds upper limit of 1000 is displayed.
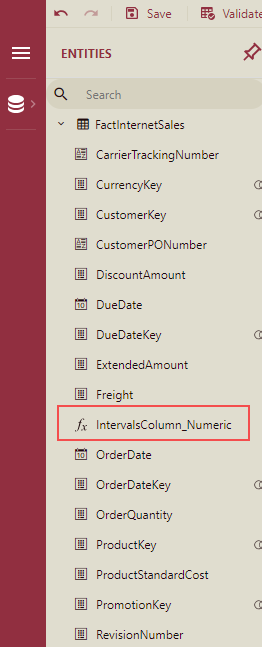
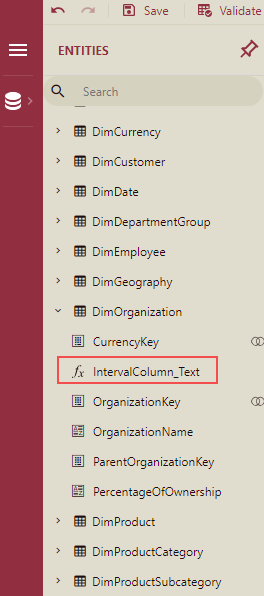
Click the Add button. The added intervals column will be displayed under the chosen entity in the Entities panel along with its other attributes.
Note: You cannot edit the autogenerated WAX expression here, but you can copy it.
Add an Intervals Column when text column is selected
Follow the below steps to add an Intervals column to the entity.
From the Entities panel on the left, select an entity. In this example, we have selected the 'DimOrganisation' entity.
Click the More button and then select the Add Intervals Column option from the list under the Quickly Create category.
Add Intervals Column dialog box is displayed.
Enter the Name of the new intervals column.
Select the text column from the current table from the Field dropdown list.
All the values of the column in the database will be displayed under Ungrouped field values.
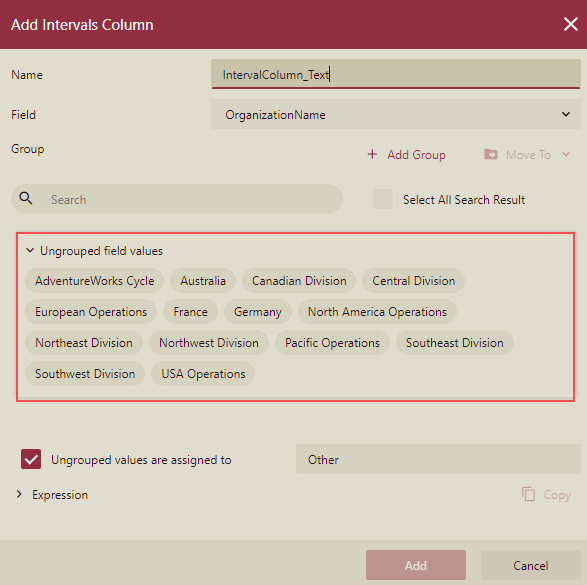
You can add or delete the Group, and can batch move the data of one group to another group. Click the Add Group
 to add the group.
Select the values from the Ungrouped field values section to be moved to the added group and click the Move To button and select the group to which you want to move the values.
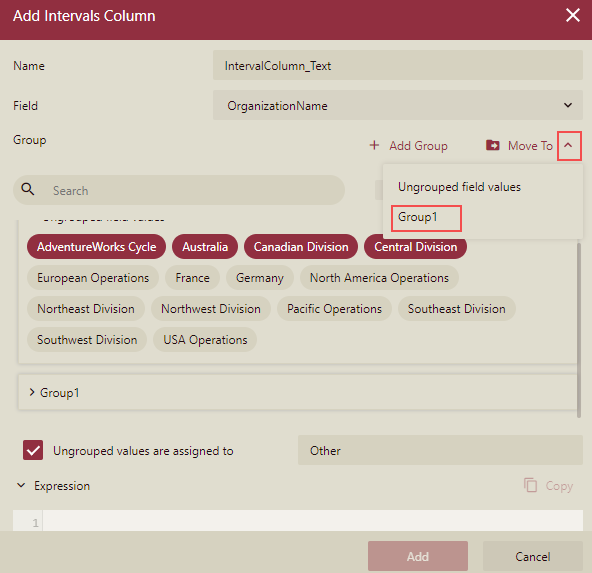
All the selected values will be moved to the selected group.
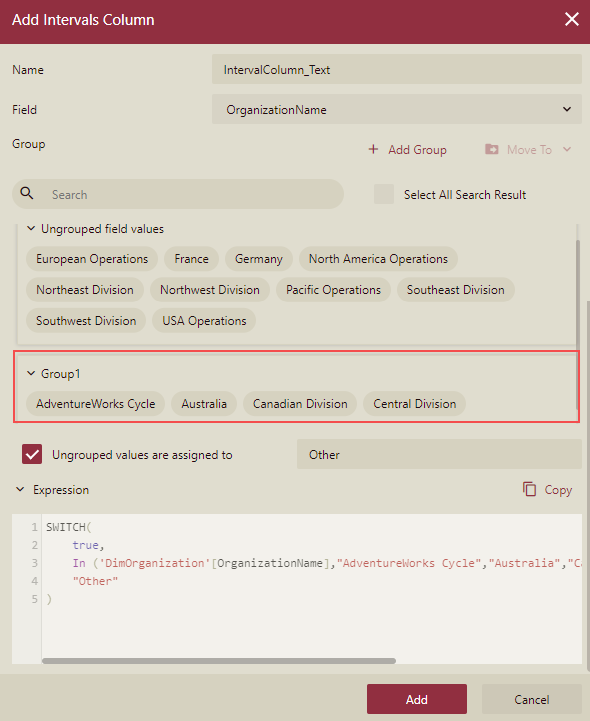
Similarly, you can add more groups if required and the WAX expression will be autogenerated.
Note: The search box on the group, can search all the values from the value of the selected field group, group 1, group2, etc, then select the Select All Search Results checkbox to batch move these select results.
Click the Add button, and the added intervals column will be displayed under the chosen entity in the Entities panel along with its other attributes.
Note: You cannot edit the autogenerated WAX expression here, but you can copy it.
Edit an Intervals Column
Follow the below steps to edit an intervals column in an entity.
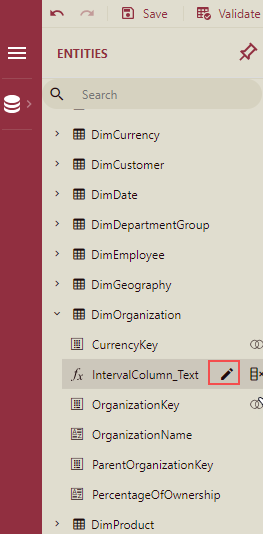
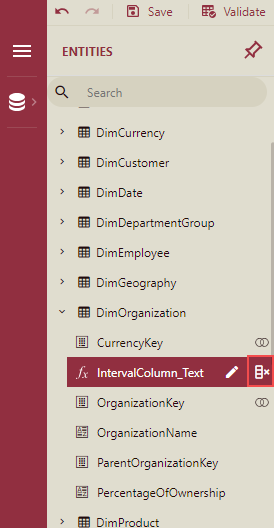
From the Entities panel, select the entity which contains the intervals column you want to modify.
Click the Edit Calculated Column button next to the chosen intervals column.
Edit Intervals Column dialog box is displayed.
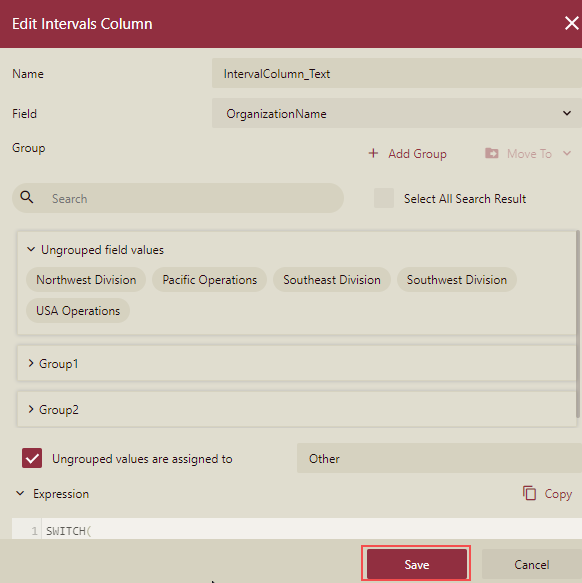
Update the existing details as per the requirement, and click the Save button.
Delete an Intervals Column
Follow the below steps to delete an intervals column from an entity.
From the Entities panel, select the entity which contains the intervals column you want to delete.
Click the Delete Calculated Column button next to the chosen intervals column.
Delete Calculated Column dialog box is displayed.
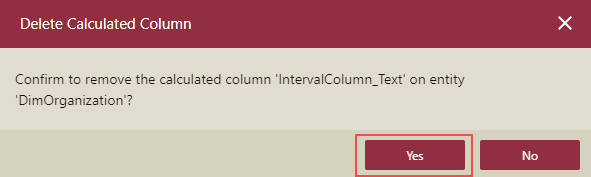
In the Delete Calculated Column dialog box, click the Yes button to confirm.