- Getting Started
- Administration Guide
-
User Guide
- An Introduction to Wyn Enterprise
- Document Portal for End Users
- Data Governance and Modeling
- Working with Resources
- Working with Reports
- Working with Dashboards
- View and Manage Documents
- Understanding Wyn Analytical Expressions
- Section 508 Compliance
- Subscribe to RSS Feed for Wyn Builds Site
- Developer Guide
Add a Local Entity
Local entity facilitates the use of external data in the direct query model along with the data in the target database. This way, you can filter and perform calculations on the local external data along with the other tables in the target database in a direct query model.
There are three ways in which you can add a local entity in the direct query model, such as entering the data manually, importing an Excel file, or importing a CSV file. The following sections describe local entities in detail.
To Create a Local Entity
This section elaborates the different ways in which you can create a local entity as discussed above. Note that only the following data sources provide support for local entities in the direct query model, which are Oracle, SqlServer, MySql, and Postgres.
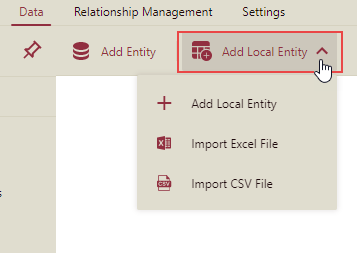
Method 1: Add Local Entity
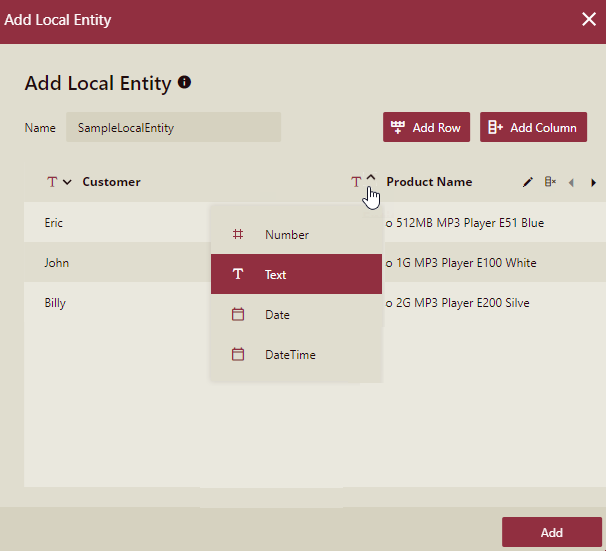
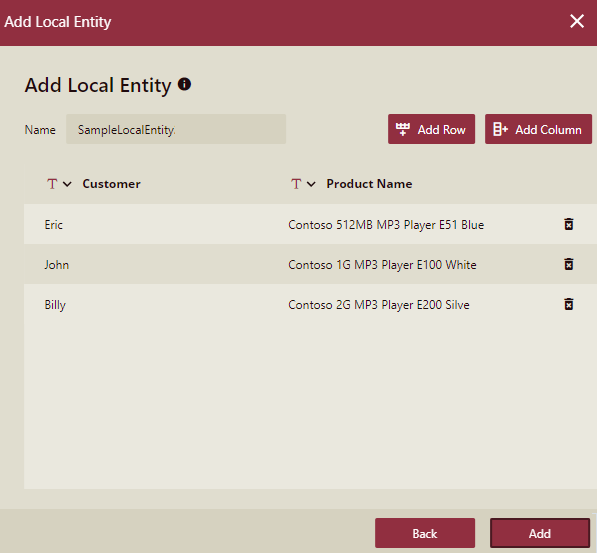
When you add a local entity, an Add Local Entity dialog box will appear. Enter a unique name for the entity. Through this dialog box, you can input the column name and specify what type of value that column can store like Number, Text, DateTime, or Date. Note that if you input a string 'NULL' in the column value, it will be converted to a null value automatically.
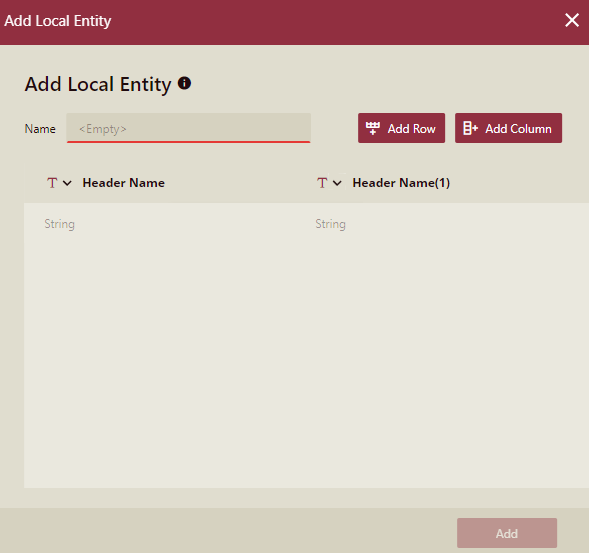
To add additional rows and columns to the local entity, click the Add Row and Add Column buttons, respectively.
This is how the Add Local Entity dialog box will appear once you input the data in it. Click the Add button to confirm.
Method 2: Import Excel File
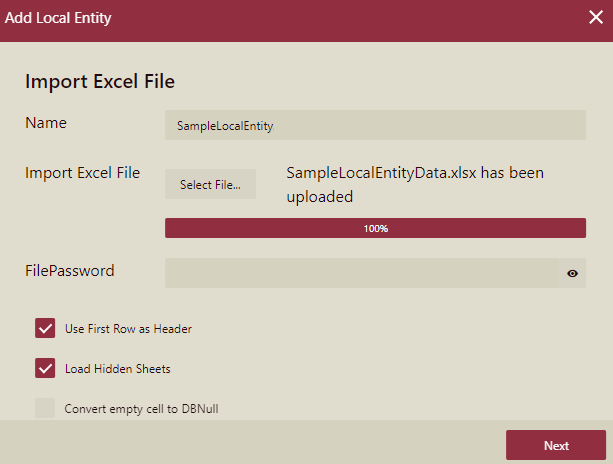
You can add a local entity by importing data from an Excel file. In the Add Local Entity dialog box that appears, specify a unique name for the entity. Then, click the Select File button to upload an Excel file from the local system. Enter the password for the Excel file, if any.
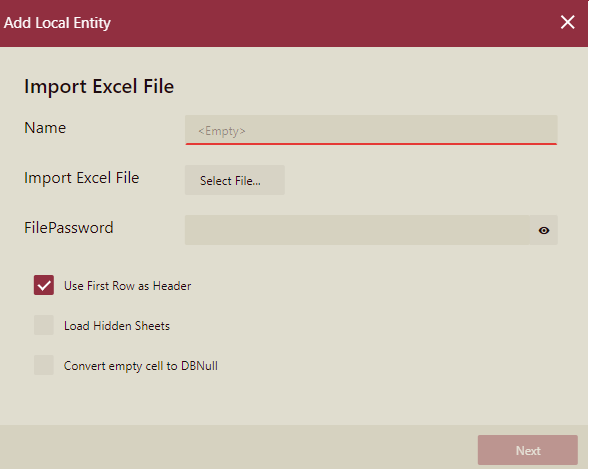
You can check these options such as Use First Row as Header, Load Hidden Sheets, and Convert empty cell to DBNull based on your Excel data. See this for information on these options.
This is how the Add Local Entity dialog box will appear once you upload an Excel file. Click the Next button to proceed further.
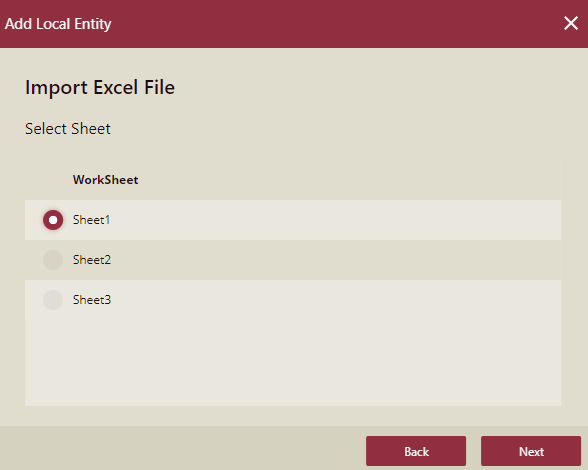
In case of multiple sheets in the uploaded Excel file, you need to select the sheet from which you want to export the data. Again, click the Next button to proceed further. Note that this step is skipped if the uploaded Excel sheet contains only one sheet of data.
The Add Local Entity dialog box displays the data uploaded from the Excel sheet. Click the Add button to confirm.
Note:
1. The data type for the column(s) storing date values in the Excel file is, by default, recognized as the DateTime data type.
2. If you switch the data type for a column from DateTime to Date, the format of the data gets changed (the time-related information is removed) but the data stored in the column remains unaffected. However, you can restore the time-related information by switching back to the DateTime data type before saving the entity.
3. After saving the entity, the time information of the Date type data converted from the DateTime type will be discarded.
Method 3: Import CSV File
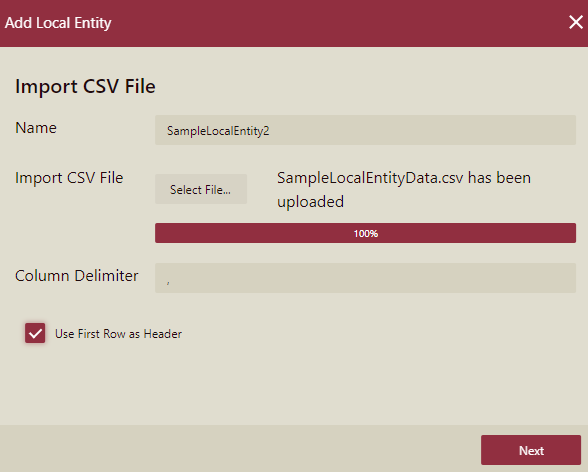
You can add a local entity by importing data from a CSV file. In the Add Local Entity dialog box that appears, specify a unique name for the entity. Then, click the Select File button to upload a CSV file from the local system. Enter the column delimiter used in the CSV file to separate the values.
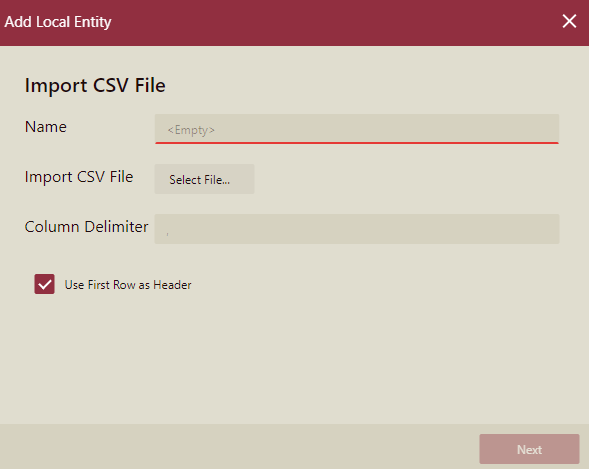
You can check the Use First Row as Header option if the first row in the CSV file contains column headers.
This is how the Add Local Entity dialog box will appear once you upload a CSV file. Click the Next button to proceed further.
Note:
1. The data type for the column(s) storing date values in the CSV file is, by default, recognized as the DateTime data type.
2. If you switch the data type for a column from DateTime to Date, the format of the data gets changed (the time-related information is removed) but the data stored in the column remains unaffected. However, you can restore the time-related information by switching back to the DateTime data type before saving the entity.
3. After saving the entity, the time information of the Date type data converted from the DateTime type will be discarded.
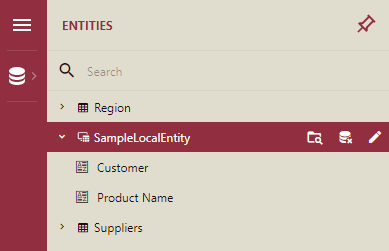
To Manage a Local Entity
A local entity is represented by the ![]() icon in the Data Model designer. You can preview, delete, and edit entity data by selecting the desired entity in the list as shown.
icon in the Data Model designer. You can preview, delete, and edit entity data by selecting the desired entity in the list as shown.
Preview - Displays the added data in the entity.
Delete - Removes the selected entity. Note that, once you delete an entity, it is gone forever.
Edit Entity Data - Enables you to modify the existing information for that entity like its name, column names, column data types, delete existing row or column, and so on.
Important Properties
The below table lists the properties for the local entity which you can set in the Properties panel on the right.
Property Name | Description |
|---|---|
Name | The name of the entity. |
Is Hidden | Indicates whether the entity is hidden from end-users. |
Security Filter | Allows you to use custom security providers to filter the data displayed for the entity. |
The below table lists the properties for the attribute in the local entity which you can set in the Properties panel on the right.
Property Name | Description |
|---|---|
Name | The name of the attribute. |
Is Nullable | Specifies whether the attribute can contain null values. |
Is Unique | Specifies whether the attribute can accept duplicate values. |
Logical Data Type | The attribute data type. If there is an expression, the data type must match the data type of the expression. |
Data Category | Gives visualization hints related to the attribute type when generating a smart scenario through the Visualization Wizard. Different data types have different possible values. For example, the string data type supports these values: Geography (Region), Image URL, or Image Binary. The numeric data type supports these values: Currency, Geography (Latitude), or Geography (Longitude). |
Is Hidden | Indicates whether the attribute is hidden from end-users. When the data model is used in the report, hidden attributes are not displayed. |
* Is Nullable and Is Unique properties depend on the data in the local entity.
Limitations
These are a few limitations of using a local entity in the direct query model, such as -
You can add a maximum of 2000 rows for a local entity.
You can add a maximum of 14 rows for a local entity.
Local entity reduces the performance of the direct query engine.