- Getting Started
- Administration Guide
- User Guide
- Developer Guide
Upload Resources
For reporting and in-depth visualizations, you need supporting resources. These resources include data sources, datasets, data models, templates, master reports, floor plans, images, themes, dashboards, reports, web pages, fonts, and language resources. If you have these resources in your system, you can transfer them to the server using the Resource portal. You generally upload the resources in conjunction with the file downloading process to migrate the files between the servers.
Wyn Enterprise supports the following file types when uploading the resources on the Resource Portal.
File Type | Supported Format |
|---|---|
Data Model | .smdsc |
Data Source | .dsc |
Dataset | .cdst |
Report | .rdlx |
Dashboard | .dbd |
Web Page | .wbp |
Template | .rdlx-template |
Master Report | .rdlx |
Floor Plan | .floorplan |
Font | .ttf / .otf / .woff / .woff2 / .svg / .eot |
Image | .png / .gif / .bmp/ .jpg / .svg |
Theme | .rdlx-theme |
Map | .json |
Language Resource | .lr |
Note that uploading files (feature available on the Resource Portal) is different from importing files (feature available in the Admin Portal), where the import functionality unzips the archived document and all the relevant documents (or resources) referred in the document. For more information, see Import.
To Upload a Resource
Switch to the Resource Portal and navigate to the Create tab.
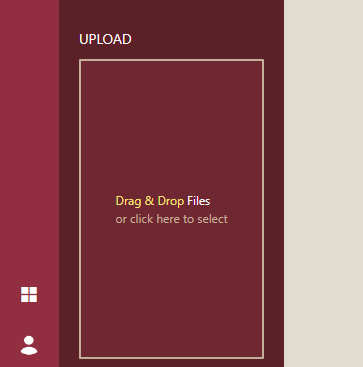
Click Drag & Drop Files or click here to select on the bottom-left corner of the portal. Or, drag the file(s) from your system and drop them into the upload area.
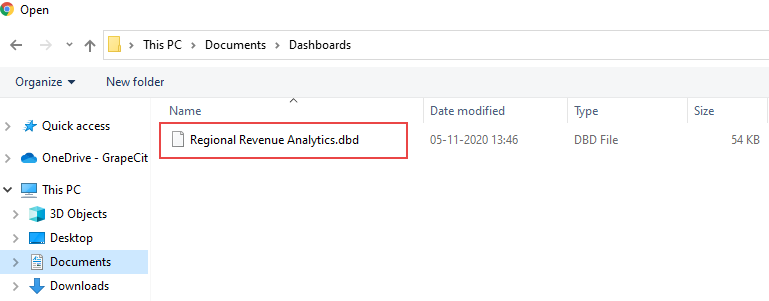
In the Open dialog that appears, browse the file(s) from your system that you want to upload and click the Open button. Note that the files with invalid extensions will not be uploaded to the server.
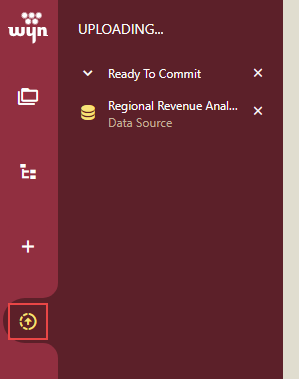
You will be redirected to a new tab on the Resource Portal - Upload where you can view the file(s) being uploaded.
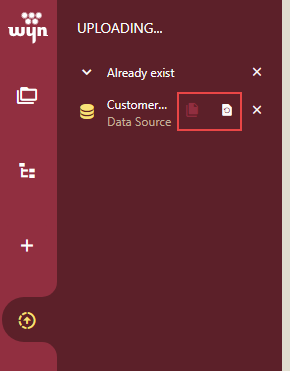
If you upload a file in Wyn Enterprise with a name that already exists, you can keep both the files or overwrite the existing file with the new one.
Click the Commit button to complete the file transfer. The uploaded resource(s) is accordingly added in the suitable category.

Note: If the Administrator has set a file upload size limit, then you cannot upload a document larger than the set size limit. An error message will be displayed if the file upload size is more than the set limit.