- Getting Started
- Administration Guide
- User Guide
- Developer Guide
Add Language Resource
Wyn Enterprise supports the internationalization of documents (i.e., reports and dashboards) by displaying the content according to the user's location or language. It lets users create multilingual documents. A multilingual document is a document that displays in different languages, say, users in the UK will see the document in English, and users in Poland will see the same document in Polish.
To build a multilingual document in Wyn Enterprise, you need to create its corresponding language resource. A language resource is a text file that defines key-value pairs for the text in a document. It is later added to the document to display the content based on the user's preferred language.
How to Create Language Resources
Language resources are created and managed on the Resource Portal. They contain the translation keys for one or more languages in which the users want to view the documents. Let's suppose, a company shares a document with its employees residing in the UK and Poland. Instead of creating two documents in different languages, the company should create a language resource, and reference it in the document shared with the users. See the below image.
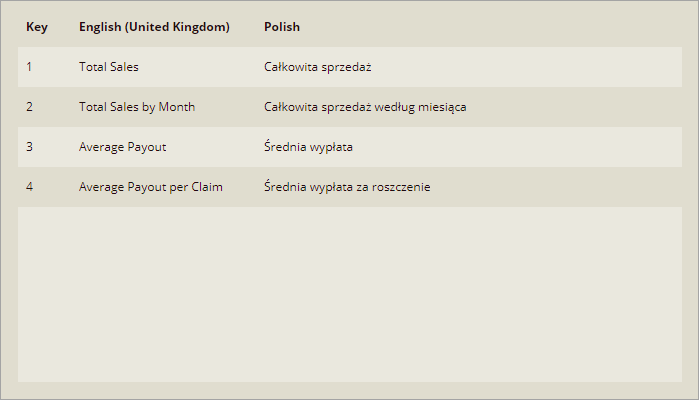
Language resources remove the need to create duplicate documents in different languages.
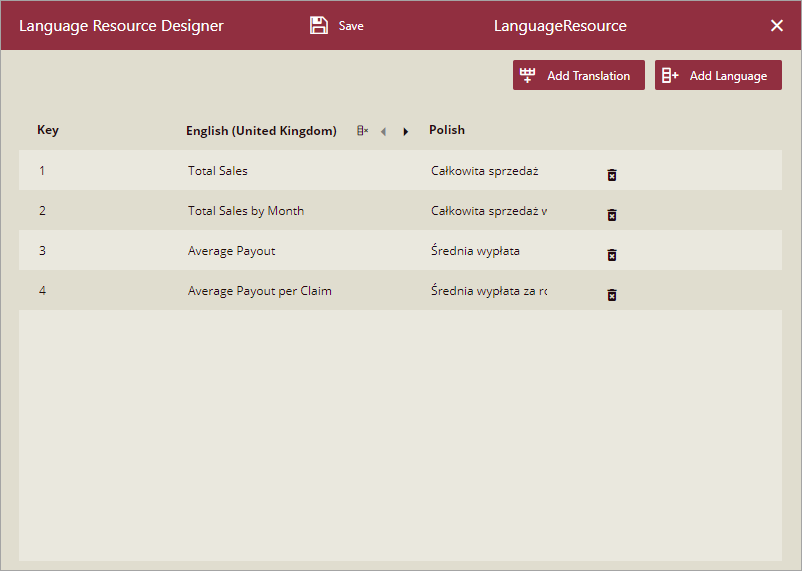
To create a language resource, go to Create > Add Language Resource on the Resource Portal. Use Add Translation and Add Language in the Language Resource Designer to insert a translation key and language, respectively. The default translation languages supported by Wyn Enterprise are English, English (United Kingdom), Chinese (Traditional), Chinese (Simplified), and Polish. If these languages do not meet the user's requirements, you need to create a custom language pack.
To delete a translation key or a column, use the Delete icon next to it. Furthermore, use the Shift Arrow buttons to change the order of language columns.
How to Reference Language Resources in Dashboards
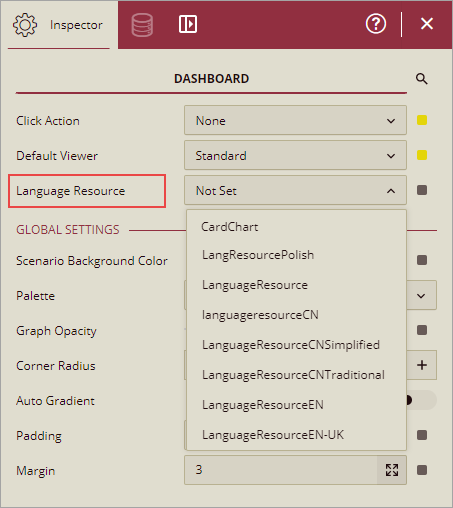
Use the document setting, Language Resource to specify which resource document you want to reference. Note that a language resource does not translate the entire content of the dashboard, but the constant values used in titles, attribute names, null blank or empty values, and so on. You can also use the language resource to rename a bound attribute in a dashboard.
After referencing the document, bind the translation keys to the dashboard scenario properties. Translation keys can be applied to the following dashboard scenario properties, such as Title, No Data Content, Show Null As, and Show Empty As. Translation keys can also be used in rich text scenarios and while renaming an attribute.
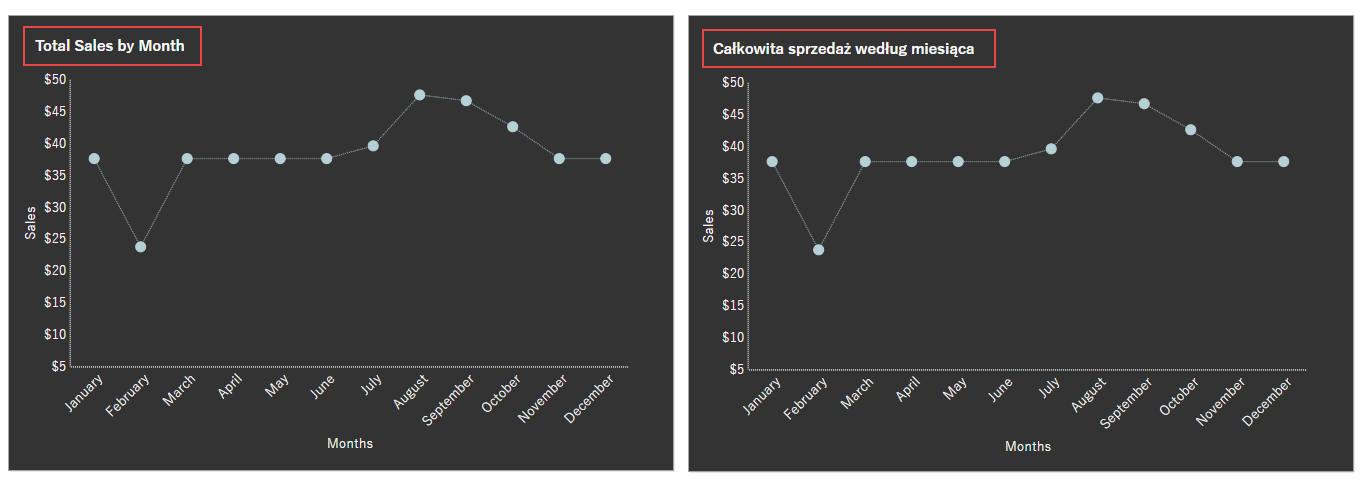
Let's consider the scenario discussed above where a company wants to share a document with users in the UK and Poland. Add the language resource to the dashboard, and then bind the translation key to the chart title.
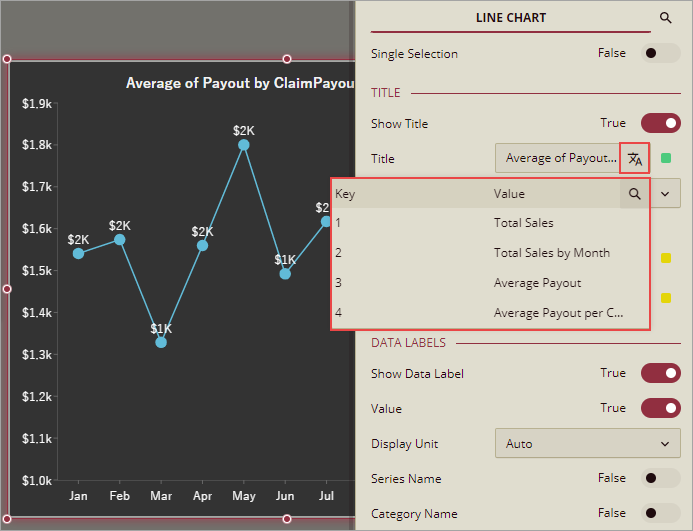
This is how the chart title will appear to users in different locations i.e., the UK and Poland.
(For an enlarged image view, open the image in a separate tab.)
How to Reference Language Resources in Reports
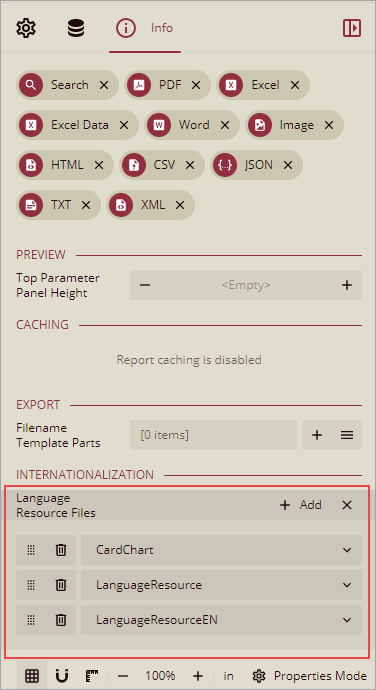
Use the Language Resource Files property in the Info Panel to specify which resource documents you want to reference. In a report, users can add multiple language resources and their order of placement denotes their priority. For example, if the first and the last resource documents contain the same translation key, the key value from the last file will be used.
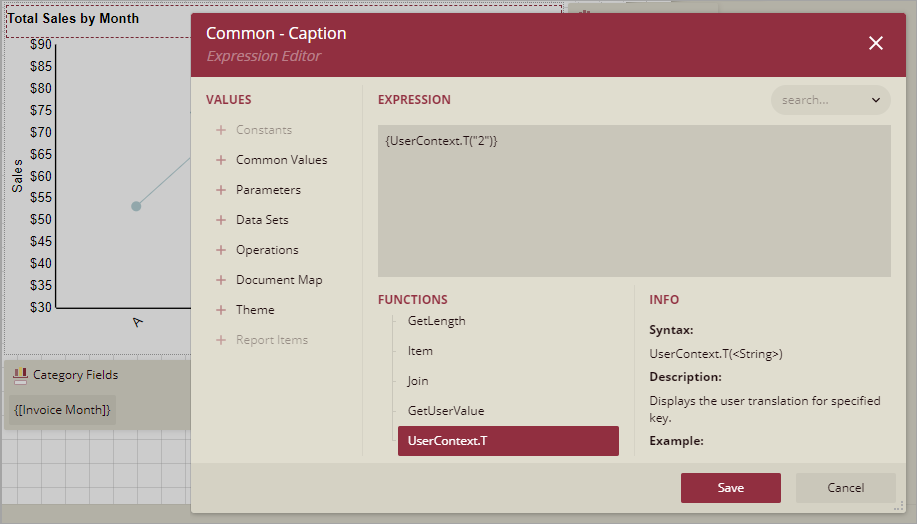
A language resource does not translate the entire content of the report, but the dynamic values used in the textbox, checkbox, chart titles, chart category axis, and so on. After referencing the resource document, use the UserContext.T() function under the Miscellenous Functions. This function can be applied to any report control property that accepts expressions such as Textbox Value, Checkbox Text, Chart Header Caption, Chart Axis Title, and so on. The UserContext.T() function displays the value for the specified translation key enclosed in double quotes.
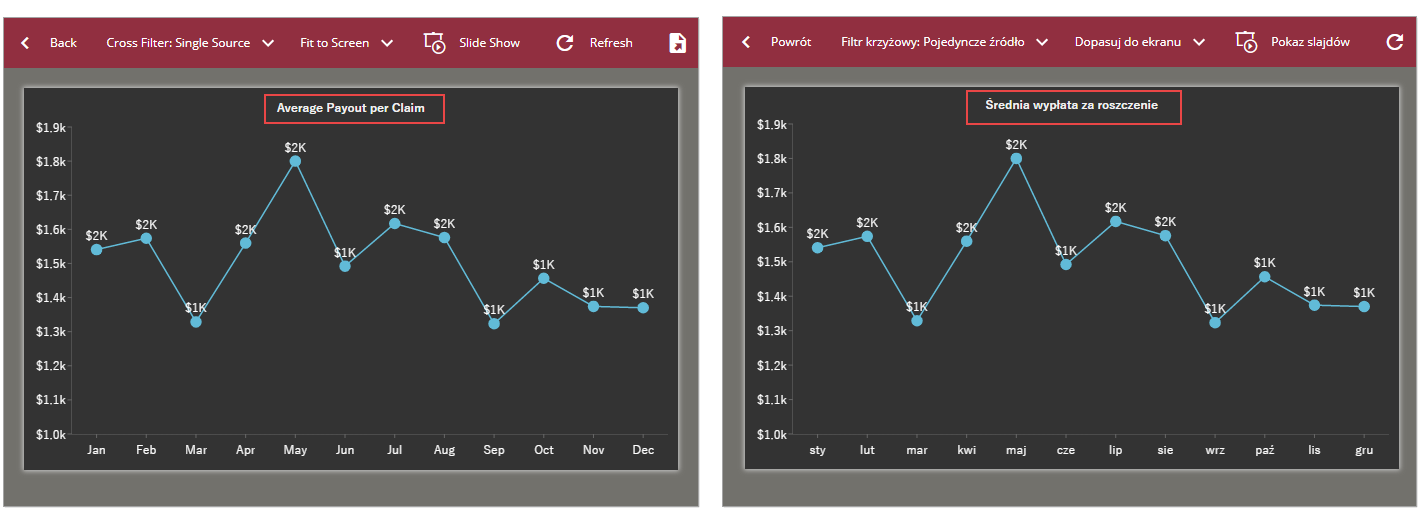
Let's consider the scenario discussed above where a company wants to share a document with users in the UK and Poland. Add the language resource to the report, and then use the UserContext.T() function in the chart title.
This is how the chart title will appear to users in different locations i.e. the UK and Poland.
(For an enlarged image view, open the image in a separate tab.)
Note: The language resource generates the required result only if the current user's language and translation language is the same.
• For instructions on how to change the user's language, see Set Language Preference.
• For instruction on how to change the language using lng parameter in the URL, see Using Integration URLs.
Export/Import Language Resources to Excel files
You can export the selected language resource into Excel format (using the Export Excel option), edit it and import (using the Import Excel option) it back into the system in the Excel format.
The imported Excel will overwrite the content of the existing language resource.
You can see the Export Excel and Import Excel options in two places:
From the toolbar of the Language Resource page.

From the More
 action list for Language Resource file.
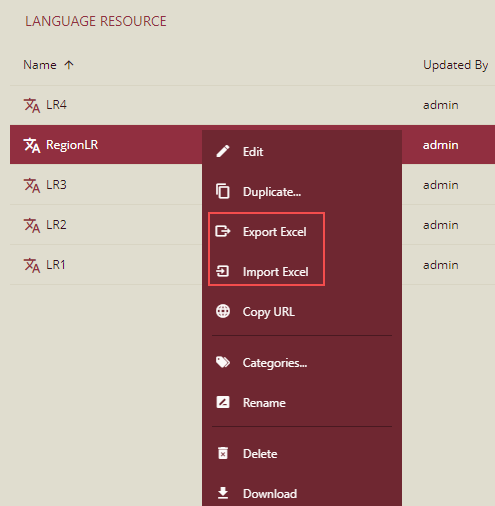
Steps to update the existing language resource using the Export and Import Excel option
On the Language Resource page, select the Language Resource, and click the More
option and select Export Excel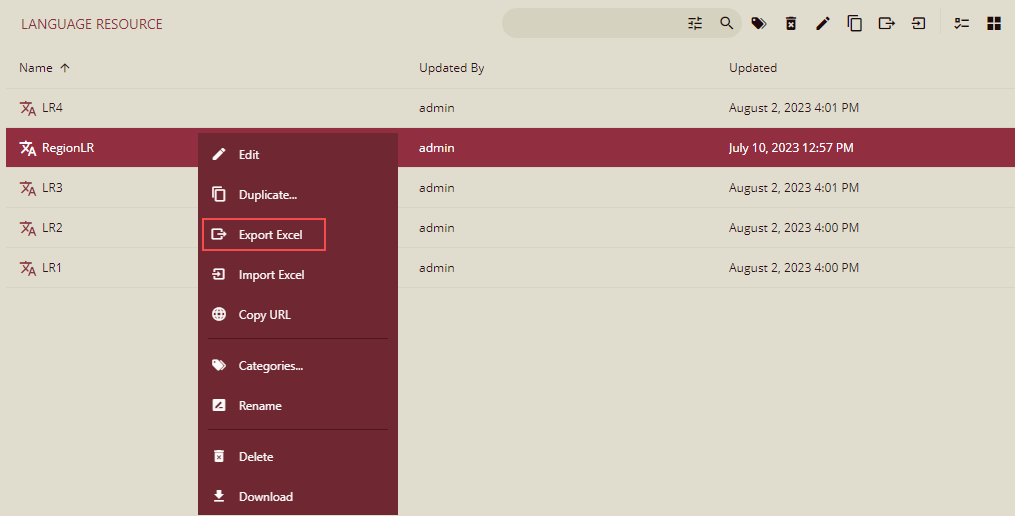
The file will be exported in excel format.
Edit the exported language resource excel file as per the requirement and save it at a location in your system.
Select the language resource file, and click More
option and select Import Excel option.
The open dialog box is displayed.
Select the file from the location where it was saved and click the Open button.

A confirmation message is displayed.

The language resource file is overwritten and updated as per the requirement.
Important information related to updating the language resource
Listed below are a few points that should be kept in mind while updating the language resources.
Language resource files can be imported in excel format only. If, while importing the file, the format is other than Excel, then an error message will be displayed.
The language resource file can be exported with Integrated URL as well.
Shared language resource file(Read and Write permission) can be exported.
If the language resource is shared with Read permission to some user, then that user will not be allowed to import the language resource file.
The language resource file cannot be imported if:
The key is not unique
The language code is repeated
The language code is invalid
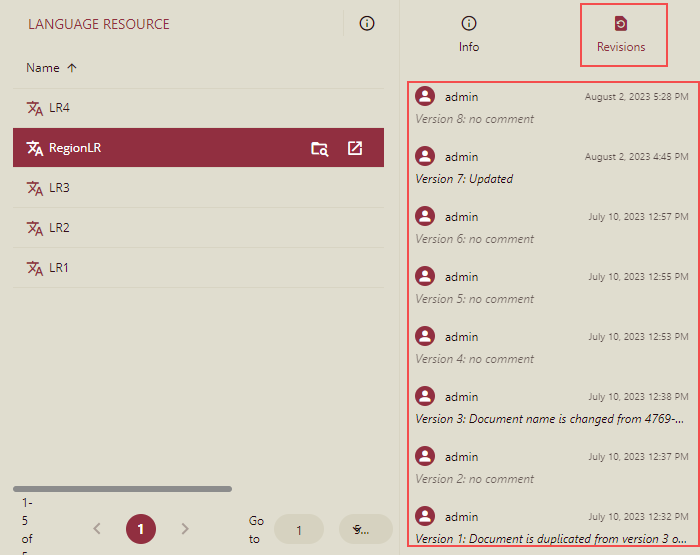
The version description under Revisions in the Info panel will be updated based on the number of imports. If it is imported multiple times, then it will be shown as below.