- Getting Started
- Administration Guide
-
User Guide
- An Introduction to Wyn Enterprise
- Document Portal for End Users
- Data Governance and Modeling
- Working with Resources
- Working with Reports
- Working with Dashboards
- View and Manage Documents
- Understanding Wyn Analytical Expressions
- Section 508 Compliance
- Subscribe to RSS Feed for Wyn Builds Site
- Developer Guide
Add Rows and Columns
Once you create a table in the report designer, you can insert and delete additional rows and columns in your table based on your requirement.
To Add Rows and Columns to a Table Data Region
Follow the below steps to add rows and columns to a table.
Add rows in a table
This section describes the different ways to add rows to a table.
Method 1:
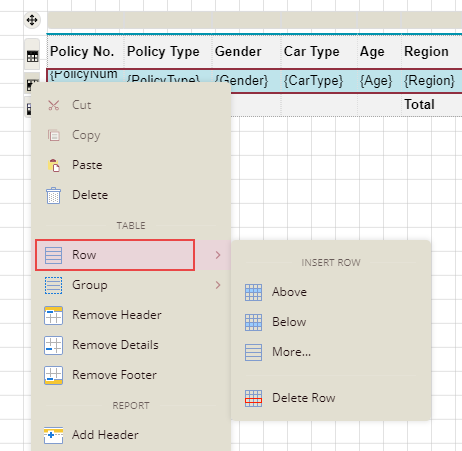
Select the cell in the row (or the entire row) where you want to add a row.
Right-click the selected cell (or row), and choose one of the following insert options from the context menu -
To add a new row above the selected row, choose the Row > Insert Row - Above option.
To add a new row below the selected row, choose the Row > Insert Row - Below option.
Method 2:
Click anywhere inside the table.
A row handler will appear when you place the cursor to the left of the table row. Click the row handler to add a new row.
Method 3:
Select the cell in the row (or the entire row) where you want to add a row.
Right-click the selected cell (or row), and choose the Row > More option from the context menu.
In the Insert Rows dialog box that appears, specify the number of rows you want to insert and their position (i.e. above or below) with respect to the selected cell (or row) in the table. The Count field in the dialog accepts values ranging from 1 to 20.

Click the Insert button.
Add columns in a table
This section describes the different ways to add columns to a table.
Method 1:
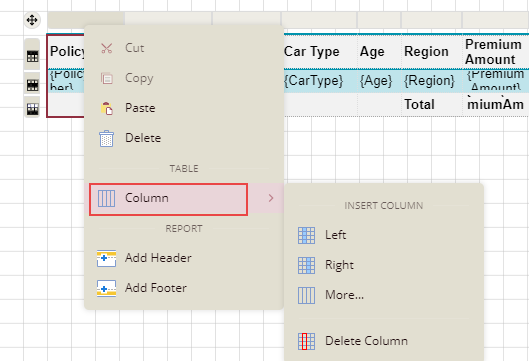
Select the cell in the column (or the entire column) where you want to add a column.
Right-click the selected cell (or column), and choose one of the following insert options from the context menu -
To add a new column to the left of the selected column, choose the Column > Insert Column - Left option.
To add a new column to the right of the selected column, choose the Column > Insert Column - Right option.
Method 2:
Click anywhere inside the table.
A column handler will appear when you place the cursor on the top of the table column. Click the column handler to add a new column.
Method 3:
Select the cell in the column (or the entire column) where you want to add a column.
Right-click the selected cell (or column), and choose the Column > More option from the context menu.
In the Insert Columns dialog box that appears, specify the number of columns you want to insert and their position (i.e. left or right) with respect to the selected cell (or column) in the table. The Count field in the dialog accepts values ranging from 1 to 20.
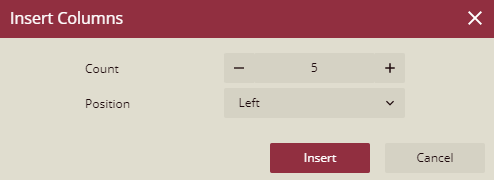
Click the Insert button.
To Delete Rows and Columns from a Table Data Region
Follow the below steps to delete rows and columns from a table.
Delete rows from a table
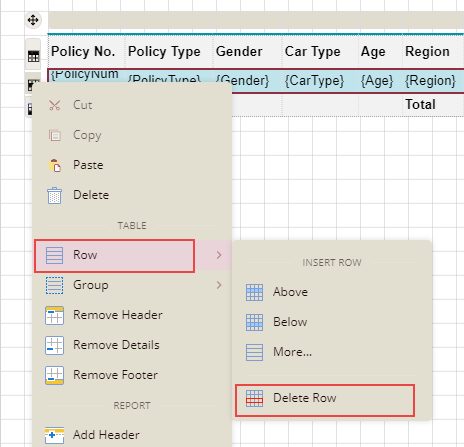
Select the cell in the row (or the entire row) which you want to delete.
Right-click the selected cell (or row), and choose the Row > Delete Row option from the context menu.
Delete columns from a table
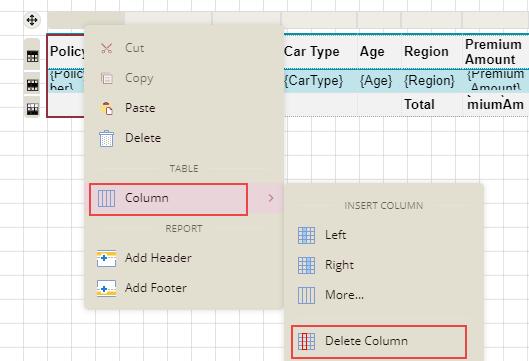
Select the cell in the column (or the entire column) which you want to delete.
Right-click the selected cell (or column), and choose the Column > Delete Column option from the context menu.