- Getting Started
- Administration Guide
-
User Guide
- An Introduction to Wyn Enterprise
- Document Portal for End Users
- Data Governance and Modeling
- Working with Resources
- Working with Reports
- Working with Dashboards
- View and Manage Documents
- Understanding Wyn Analytical Expressions
- Section 508 Compliance
- Subscribe to RSS Feed for Wyn Builds Site
- Developer Guide
Add an Attribute
An entity represents a data table that holds information within the data model. In a Cached Model, you can easily add an entity through the Get Data button and further create a custom entity using an SQL expression. For more information on data extraction, see the Create Cached Model article.
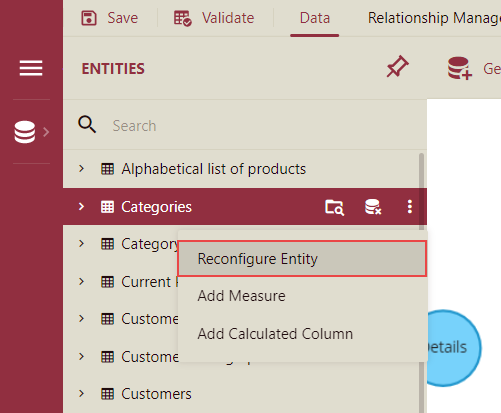
To Reconfigure Entity
There are high chances of missing columns or specifying an incorrect table definition when adding entities using SQL expressions. To resolve this issue, you can reconfigure the entity to modify its bound data source, existing table definition, or predefined alias. The process to reconfigure an entity is similar to the get data process of the cached model, used for extracting data from multiple data sources.
Note: You can reconfigure only one entity at a time.
In the data model designer, select an entity you want to modify.
Click the Ellipses icon and select the Reconfigure Entity option.
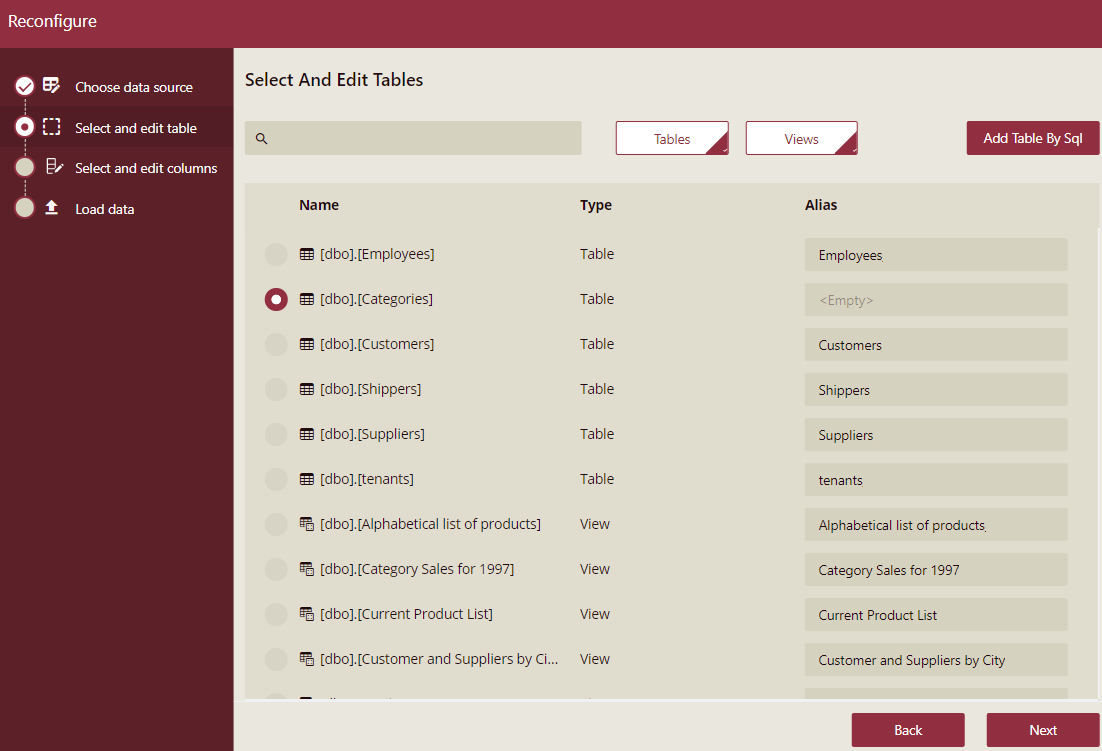
In the Reconfigure window that appears, choose the data source for the selected entity, or keep the original data source, and click the Next button.

Select the table you want to reconfigure or add a custom table using an SQL expression. In the case of the original data source, the chosen table is already selected by default.
Note: You can select only one table at a time.
Here, you can modify the table in the following ways -
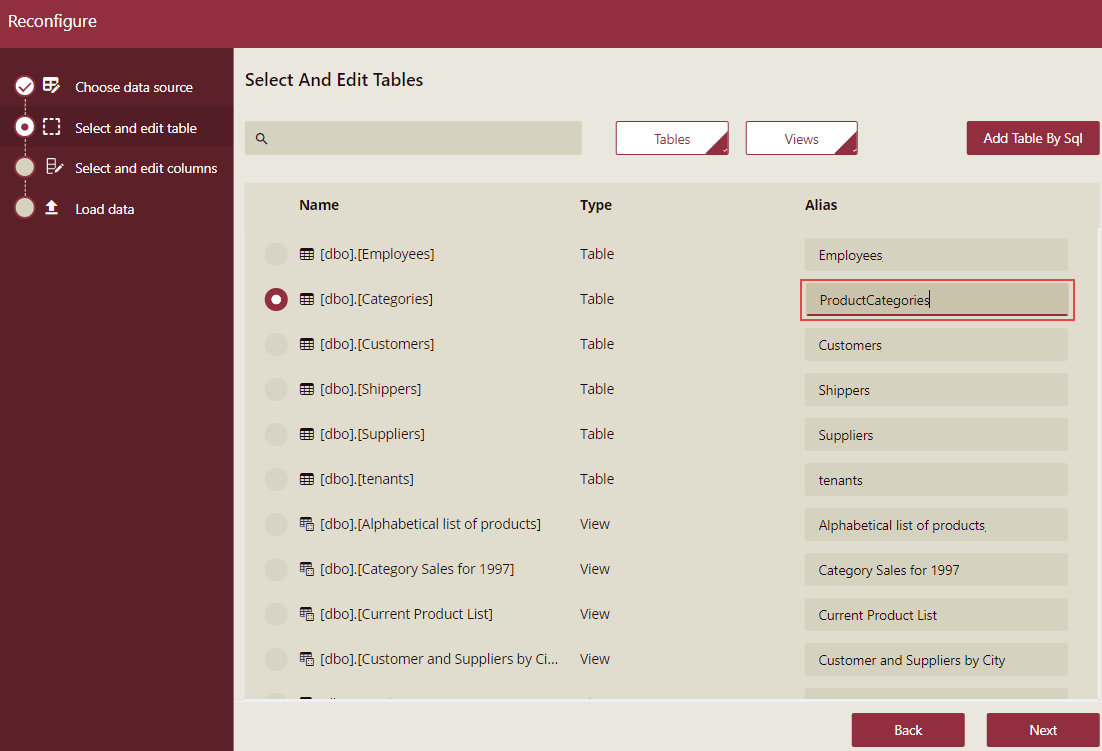
Add or change the table alias by entering the name under the Alias header.
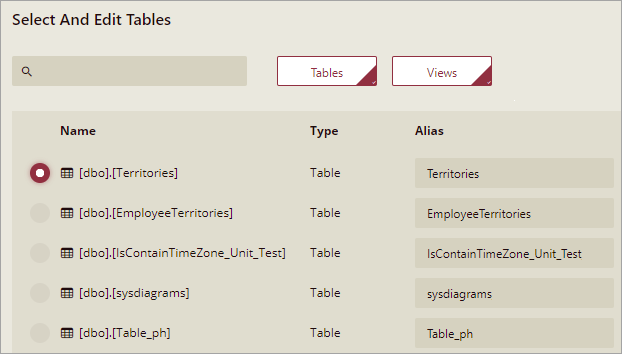
Replace the chosen entity with another table, by selecting any other table from the list. For example, over here the Categories table would be replaced by Territories.
Change the custom table definition by entering a valid SQL query using the Edit button.
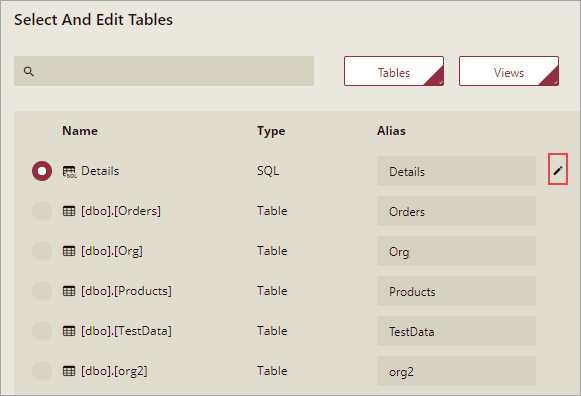
You can also change the table name using the Alias field.
The originally selected table gets replaced by the newly created custom table.
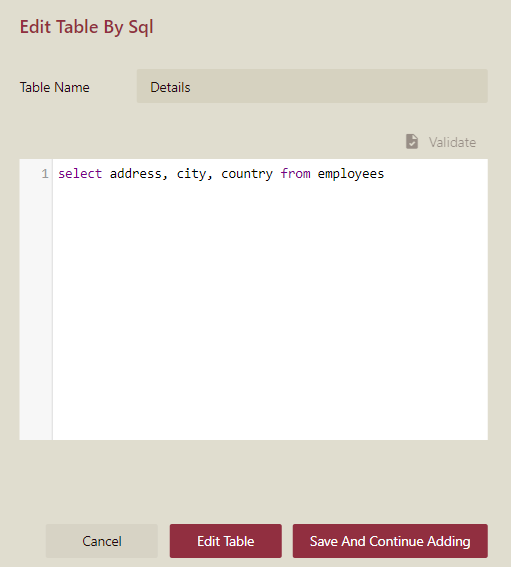
Note: In the case of unsupported column data types, an error message is displayed while selecting and editing the table.
Click the Next button to proceed further.
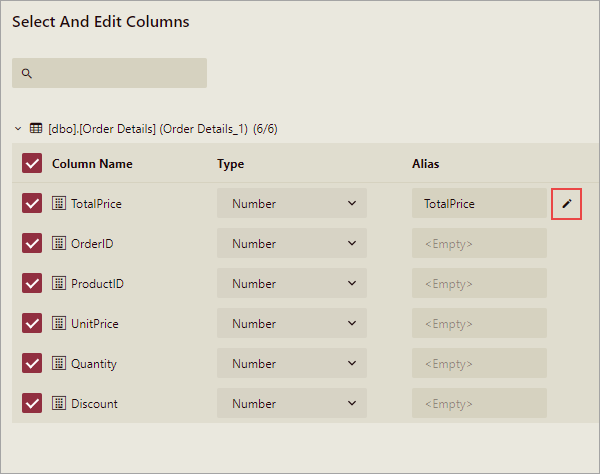
Select the table column you want to reconfigure. By default, all the columns in the table are selected. You can uncheck the checkbox next to the Column Name header to discard the default selection of columns.
Following are the different ways to modify a table column -
Change the column data type using the Type dropdown.
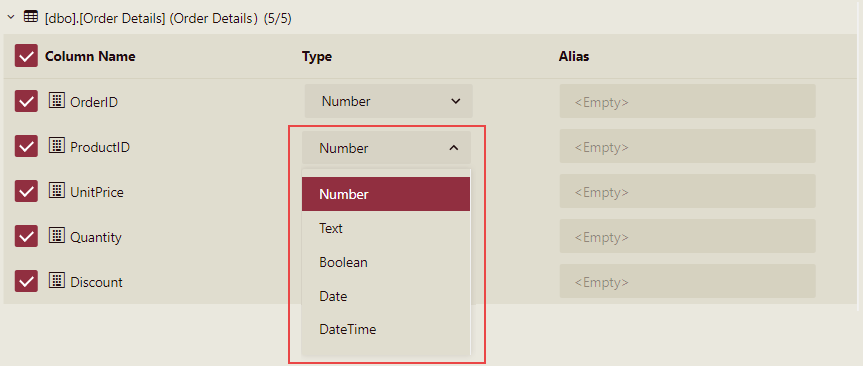
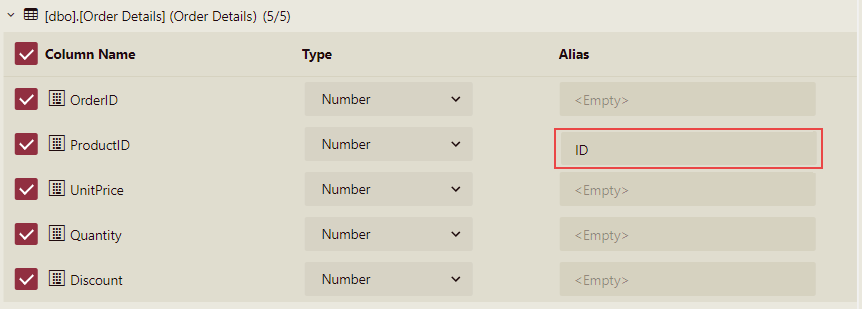
Add or modify the existing column name by entering the name under the Alias header.
Add a new custom column using a valid SQL expression.
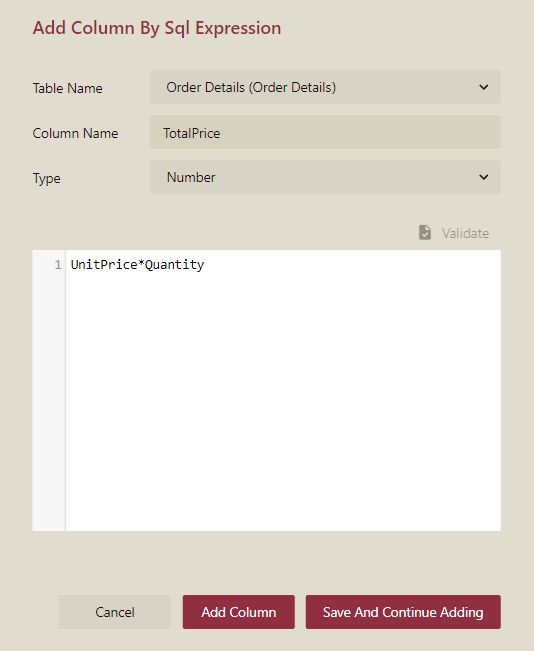
Change the custom column definition by entering a valid SQL query using the Edit button. You can also change the column name using the Alias field.
Note: You cannot add or remove a column from a custom table.
Click the Next button to proceed further.
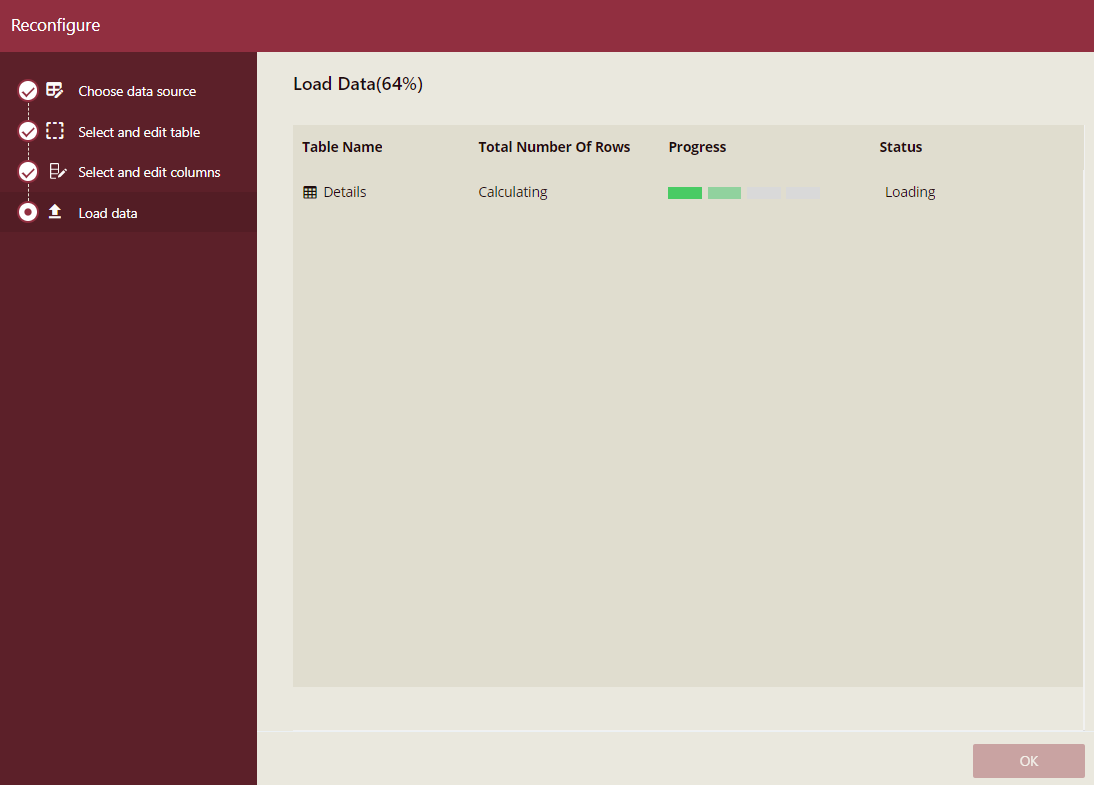
The data for the table starts loading, you can see the loading progress for the table under the Progress header.
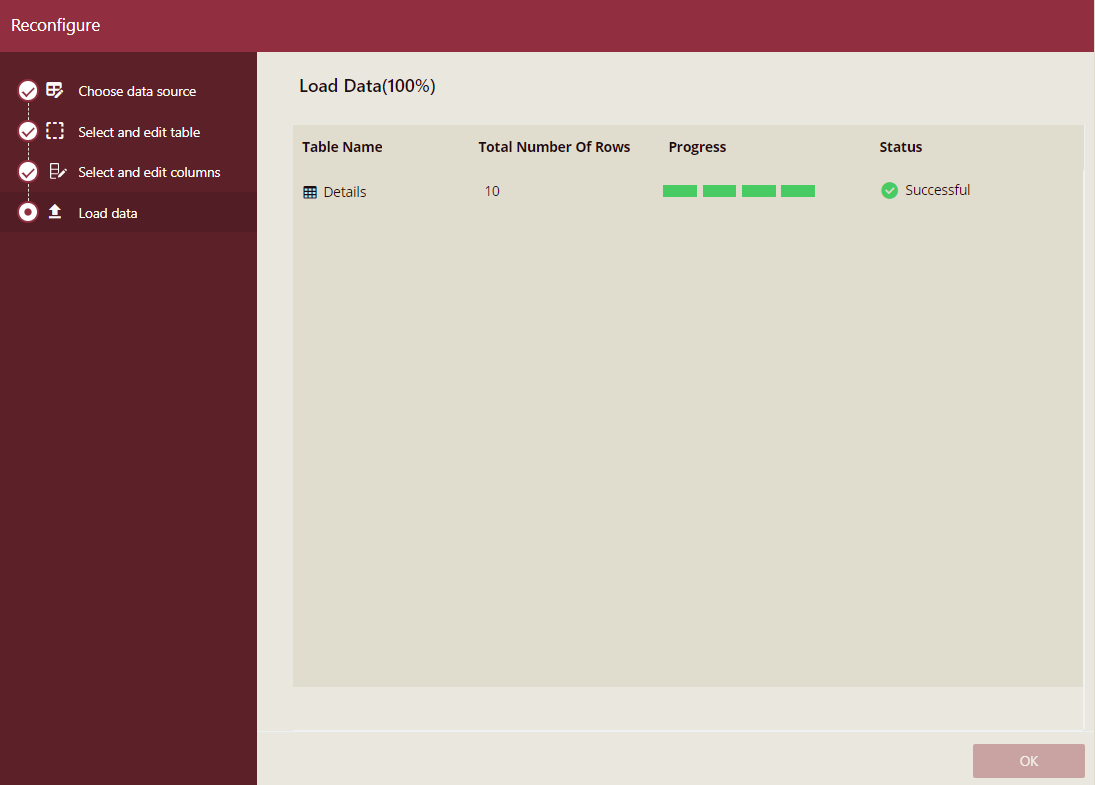
Once the data loading is complete, you will see the load status for the table under the Status header, and the number of rows loaded in that table under the Total Number of Rows header.
Note: The relationships that are no longer valid after successfully reconfiguring an entity are removed from the model.
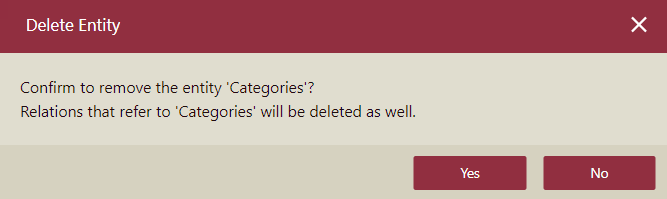
To Delete Entity
Follow the below steps to delete an entity from a cached model.
Select the entity you want to delete.
Click the Delete button next to the selected entity.

In the Delete Entity dialog box that appears, click Yes to confirm. Note that all the relationships referring to the chosen table are removed as well.
Important Properties
The following table describes the important properties of an attribute available in the Data Model Designer.
Property Name | Description |
|---|---|
Name | The name of the attribute. |
Is Nullable | Specifies whether the attribute can contain null values. |
Is Unique | Specifies whether the attribute can accept duplicate values. |
Contains TimeZone | Determines whether the DateTime attribute contains the local timezone values. You can set the property to the following values: Contains: Detects timezone information in the DateTime attributes. Not Contains: Ignores time zone information in the DateTime attributes. UnSpecified: This value only appears when an old version of the data model is migrated to a new version and does not include the local timezone in the DateTime attribute. This property is specifically used with the DateTime attributes where timezone is also included like DateTime offset. |
Binding | The database object that the attribute represents. |
Logical Data Type | The attribute data type. If there is an expression, the data type must match the data type of the expression. |
Data Category | Gives visualization hints related to the attribute type when generating a smart scenario through the Visualization Wizard. Different data types have different possible values. For example, the string data type supports these values: Geography (Country, State/Province, City, District), Image URL, or Image Binary. The numeric data type supports these values: Currency, Geography (Latitude, Longitude). |
Is Hidden | Indicates whether the attribute is hidden from end-users. When the data model is used in the report, hidden attributes are not displayed. |