Node Management
As an administrator, you can easily manage the worker modules through the Node Management interface in the Admin Portal. It allows you to install, start, stop, uninstall, and configure a worker module for a specific machine in your distributed environment.
Typically, a monitor represents a single node in the Wyn Enterprise system. The monitor that installs with the server module is the primary node. The sub-node connected to the primary node is the secondary node. The primary node manages the secondary node to install, start, stop, uninstall, or configure a worker module. There can be a number of secondary nodes connected to the primary node, with one or more worker(s) deployed on each secondary node.
Key Points -
It is always recommended to install the Server module first and add an inbound rule for port 51981 to the firewall. This is because the worker modules need to access the Server module from external machines.
Ensure that the CotWorker module installed on the secondary node has access to the database service configured by the system.
In the Linux operating system, you cannot deploy secondary nodes on the same machine as that of the primary node.
This article provides step-by-step instructions to configure the global settings for the primary node, add a secondary node, install the secondary node, and finally manage the worker modules on the machine where the secondary node is installed through the Node Management interface.
Configure Global Settings
This section describes the steps to configure the global settings for the primary node on the Node Management interface. These settings are required to add a secondary node.
On the Admin Portal, navigate to System Management > Node Management.
In the Global Settings tab, define the Log Level for the primary node. You can choose from the following log levels -
Verbose – Trace information that includes method entry, exit, and return values.
Debug – Informational events useful for debugging an application.
Information – General information that highlights the progress of the application.
Warning – Potential harmful situations that might have an adverse performance implication.
Error – Error events that can prevent normal program execution but might still allow the application to run.
Fatal – Severe error events that might force an application to terminate.
Set the Primary Node Host as the IP address of your system and modify the Identity Server URL such that it looks like this - http://<IP ADDRESS>:51980.
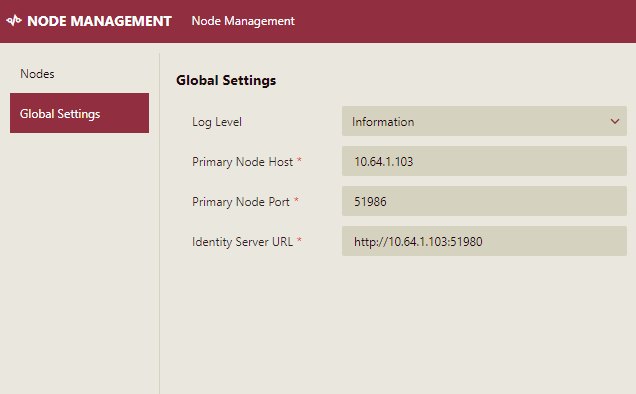
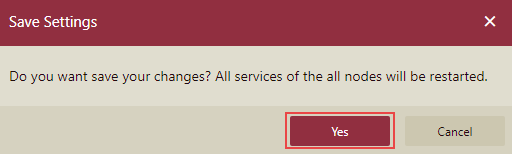
Click the Save button. A Save Settings dialog box will appear.
Click the Yes button to save the changes.
Add Secondary Node
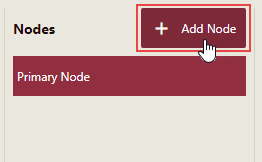
This section describes creating a secondary node on the Node Management interface.
Note: You cannot add a secondary node if the Primary Node Host or Identity Server URL uses localhost or '127.0.0.1'.
To create a secondary node, go to the Nodes tab and click the Add Node button.
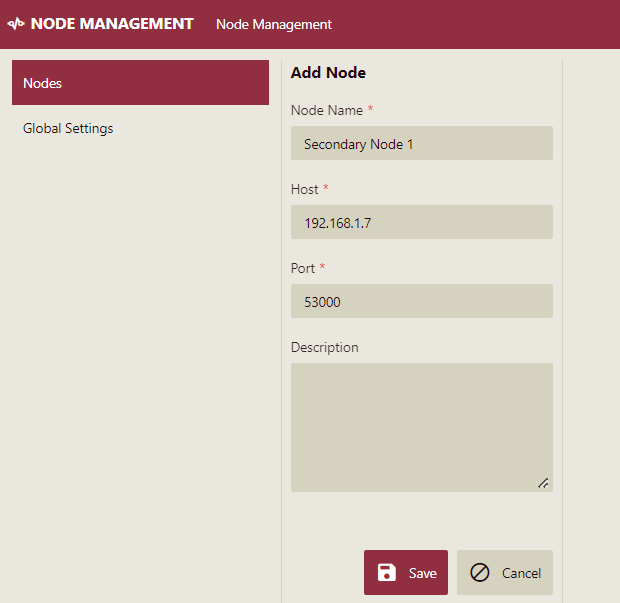
Enter the configuration details for the secondary node such as the secondary node name, the IP address of the machine where the secondary node will be deployed, and the port number.
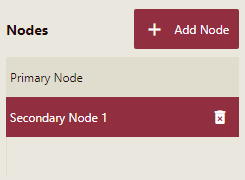
Click the Save button. The newly added secondary node is displayed in the Nodes list as shown.
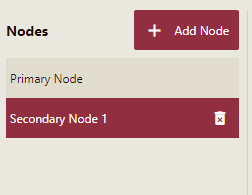
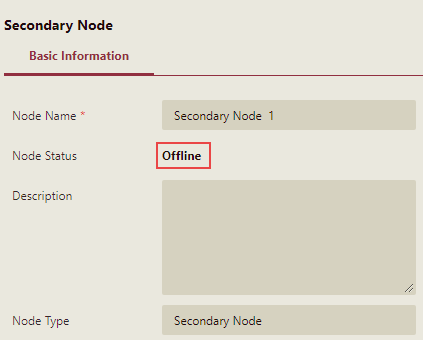
Select the secondary node (in this case, Secondary Node 1) from the list. Note that the current status of the node is Offline. Therefore, now we need to install the node on the machine where the secondary node is located.
Install the Secondary Node
This section describes the steps to install the secondary node from the Node Management interface. Scroll down to the bottom of the page and expand the How to install? section and follow the given instructions step by step.
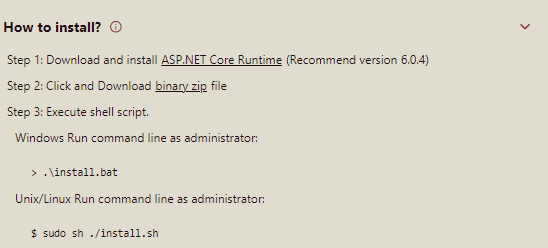
Download and install ASP.NET Core Runtime on the secondary node machine. Make sure you install the Hosting Bundle for Windows.
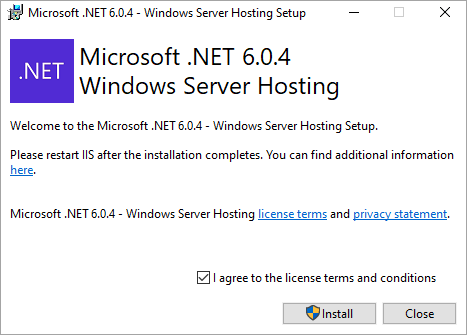
It will take few minutes to install.
Note: From release 6.0 onwards, make sure to download the ASP.NET Core Runtime 6.0 instead of 3.1.
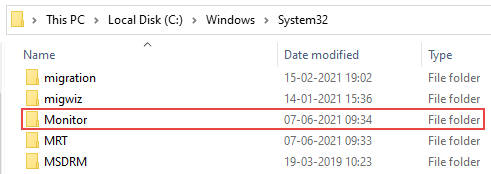
Click and download the binary .zip file. Unzip the file and copy it to the secondary node machine.
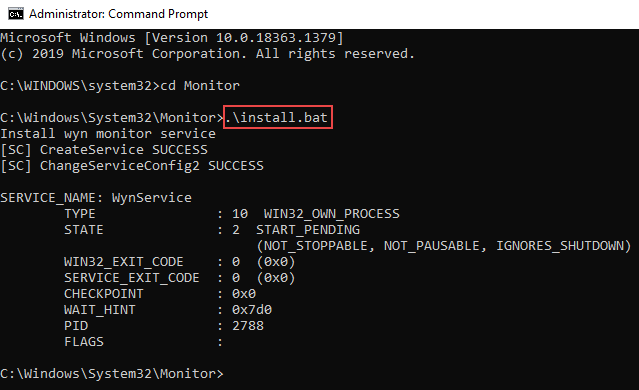
Execute the shell script as an administrator.
For Windows, run the command - .\install.bat
For Linux, run the command - sudo sh ./install.sh
After executing the installation steps, observe that the status of the node changes to Online. Now, you can install and manage the worker modules through the Node Management interface.
Note: Secondary nodes are automatically upgraded (if connected to the primary node) when you upgrade the primary node.
Manage the Worker and Service Modules
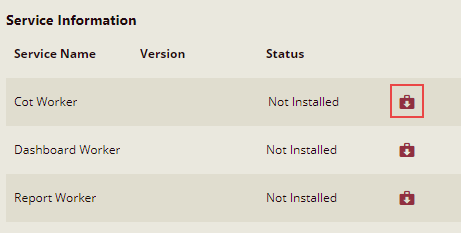
This section describes how you can manage the worker modules on the secondary node through the install, start, stop, and delete options in the Service Information section.
Note: Worker and Service modules of the primary node cannot be uninstalled.
Click the Install button next to the worker or the service module you want to install.
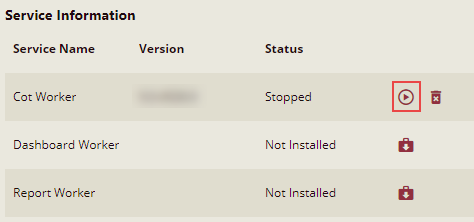
Once the installation is successful, click the Start button.
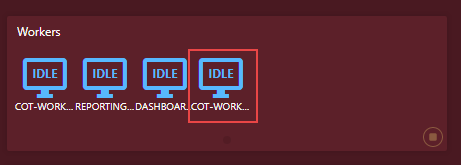
You can now view the additional worker or service on the Admin Portal.
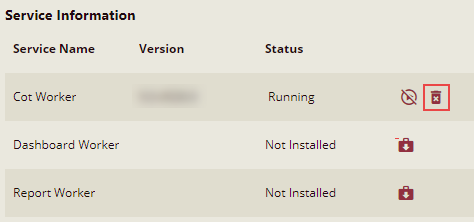
You can also remove the installed worker or service module and disable the worker or service on the secondary node using the Delete and Disable buttons, respectively.
Click the Delete button to uninstall the worker or service from the secondary node.
Click the Stop button to stop the worker or service on the secondary node.
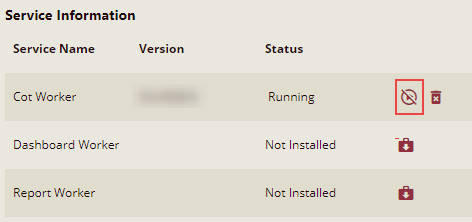
You can also restart the stopped worker or service using the Start button.
Tip: If the status of the secondary node appears as Offline, restart the Wyn Services on the machine where the secondary node is installed.
The following table shows the workers and services available in Wyn Enterprise,
Service Name | Type | Description |
|---|---|---|
AnalysisDB Service | Service | AnalysisDB Service includes the analysis database. |
COT Worker | Worker | COT Worker is a standard Wyn worker used to execute the calculation to generate column-oriented datasets. |
Dashboard Worker | Worker | Dashboard worker is a standard Wyn worker used to execute the dashboard rendering tasks. |
Java Data Source Service | Service | Java Data Source Service is a lite Java service used to fetch the schema and execute SQL commands. |
MemoryDB Service | Service | MemoryDB Service is an in-memory database service used to store temporary data for real-time datasets and execute analytical queries. |
Report Worker | Worker | Report worker is a standard Wyn worker used to execute the report rendering tasks. |
Scheduler Service | Service | Scheduler service is the main service used that communicates with the workers to monitor the worker status and assign various tasks to the workers. The scheduler service also communicates with the server to return the status and results of the worker tasks. |
Server | - | The Wyn server website that manages documents and scheduled tasks. |
Note: Scheduler Service and Server cannot be stopped. If stopped, you will encounter accessibility issues in the Wyn Enterprise application.
Uninstall the Secondary Node
This section describes the steps to uninstall or remove the secondary node through the Nodes Management interface.
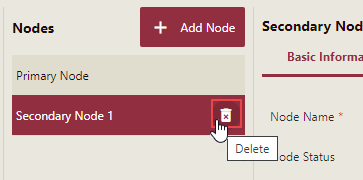
Select the secondary node from the Nodes list that you want to remove. In this case, select 'Secondary Node 1' from the list.
Click the Delete button next to the selected node.
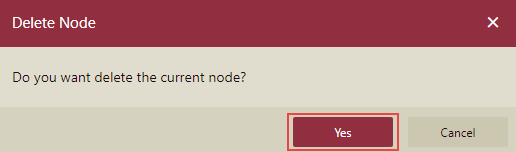
In the Delete Node dialog box that appears, click the Yes button to confirm. Note that you cannot roll back the delete operation.
Note: After implementing the above steps, execute the shell script as an administrator to remove the monitor service from the secondary node machine.
• For Windows, run the command - .\uninstall.bat
• For Linux, run the command - sudo sh ./uninstall.sh