Web Page
The Web Page interface of the Admin Portal allows you to manage the web pages created on the Resource Portal. You can easily download or delete a web page, search for a specific web page, or sort the header information alphabetically or by the latest date by clicking a specific header.
To Download Web Page
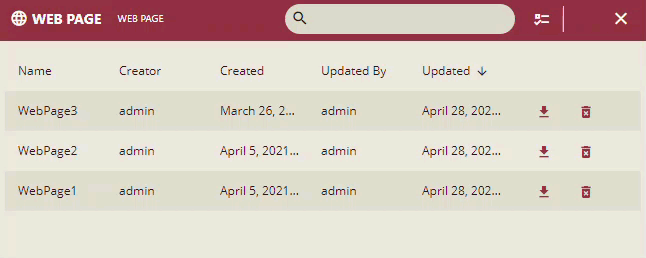
On the Types tab of the Documents page, click Web Page.
Select the web page you want to download on your system.
Click the Download button
 next to the selected web page.
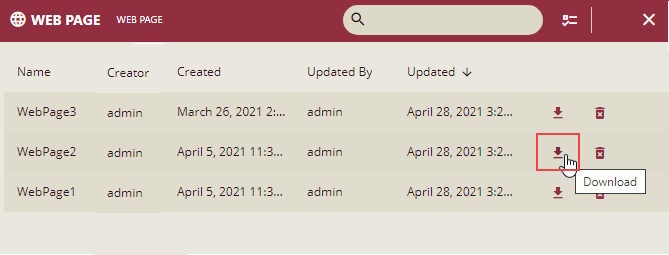
The downloaded web page is saved as a .wbp file in the Downloads folder of your system.
To Delete Web Page
On the Types tab of the Documents page, click Web Page.
Select the web page you want to delete.
Click the Delete button
 next to the selected web page.
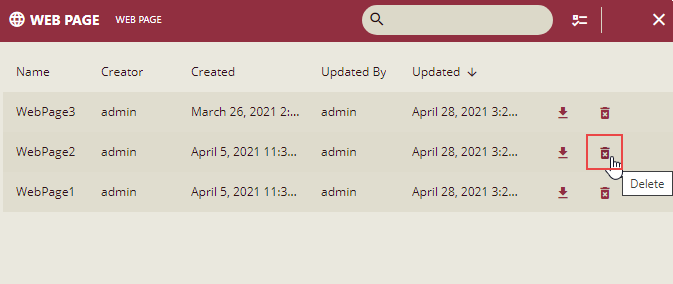
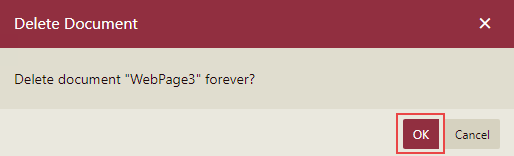
In the Delete Document dialog that appears, click the OK button to permanently delete the web page from the portal. Note that you cannot recover a deleted web page and roll back the delete operation.
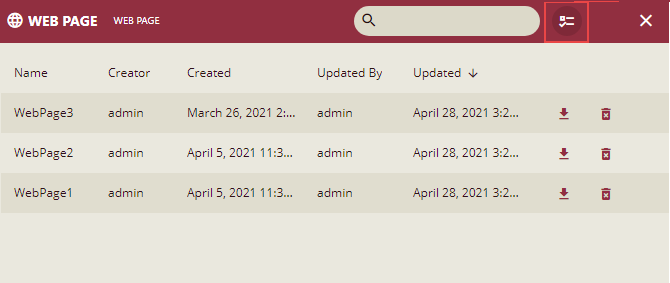
To delete multiple web pages at the same time, click the Show Check Box button present on the top right portion adjacent to the search bar. This will enable the multi-select option.
Select the web pages that you want to delete and click the Delete Selected Documents button present at the top right portion adjacent to the Hide Check Box button.
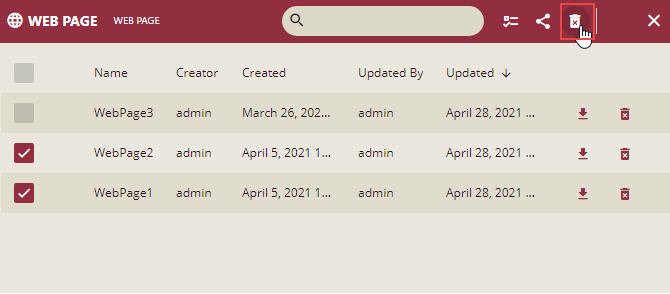
To select all the web pages at the same time, click the first check box at the top, adjacent to the Name header.
To Edit Web Page Permissions
On the Types tab of the Documents page, click Web Page.
Click Show Check Box button present at the top right portion adjacent to the search bar.
Select the web pages for which you want to edit the permissions or categories.
Select the Edit document permissions button
 to edit dashboard permissions
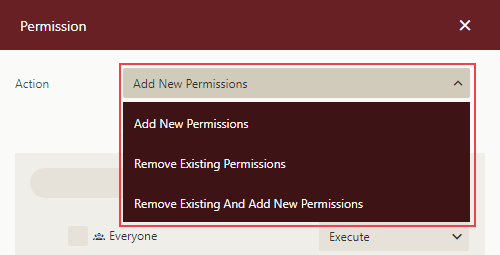
In the Permissions dialog that appears, set the Action option to any of the following options based on your requirements.
Add New Permission – Lets you define new sharing permissions for the selected documents.
Remove Existing Permissions – Removes the existing sharing permissions assigned to the selected documents.
Remove Existing And Add New Permissions – Removes the existing sharing permissions assigned to the selected documents, and lets you define new permissions for them.
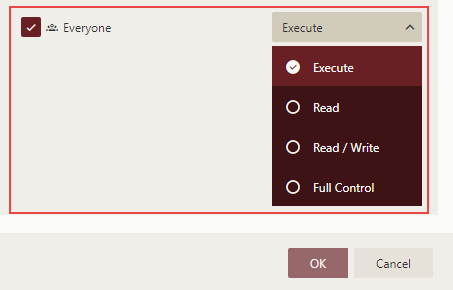
Select the sharing permission which you want the roles to have on the selected documents -
Read – Give the roles the permission to view the document.
Read/Write – Give the roles the permission to view and edit a document.
Execute – Give the assigned roles permission to schedule reports and dashboards.
Full Control – Permits the role(s) to view, edit, execute a document, and re-share the document to another role.
Note that if the shared document has references to other documents, the referenced documents will be granted Read permission (except for Datasource type documents, which will be granted Execute and Read Permissions).
Click OK.
To Edit Web Page Categories
On the Types tab of the Documents page, click Web Page.
Click Show Check Box button present at the top right portion adjacent to the search bar.
Select the web page for which you want to edit the permissions or categories.
Select categories icon
 to edit web page categories
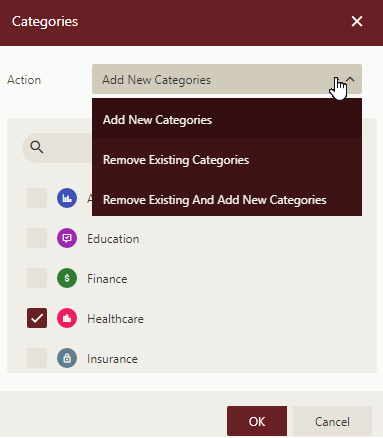
Click OK.