- Getting Started
-
Administration Guide
- Get Started with Administering Wyn Enterprise
- Configuration Settings
- Account Management
- Security Management
- System Management
- Document Management
- How To and Troubleshooting
- User Guide
- Developer Guide
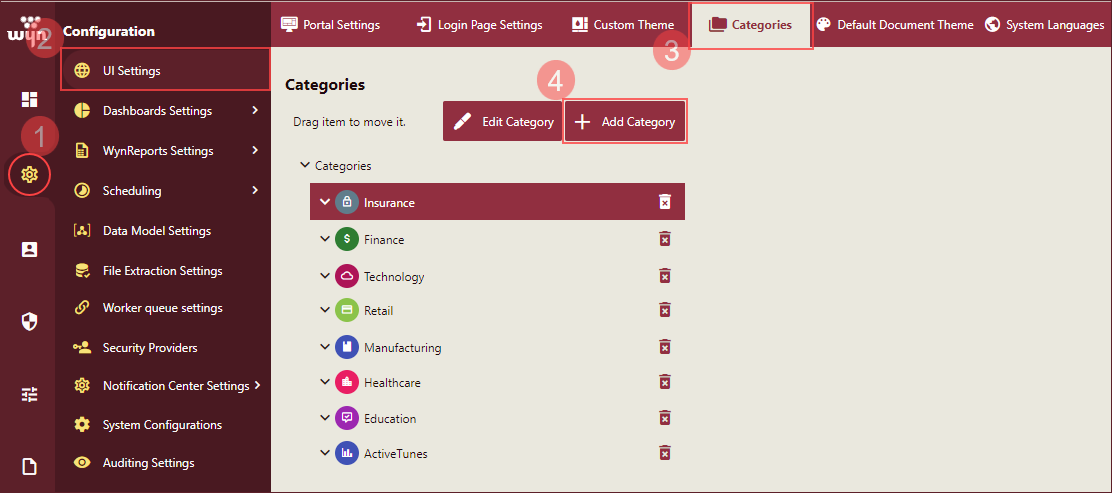
Categories
The Categories tab of UI Settings page provides you with the ability to add or edit categories to help organize your reports and dashboards. An admin has the right to add, edit, delete, and localize the name of a category and a sub-category. The Role determines whether a category is visible to an end-user or not.
To Add a Category
Navigate to Configuration >> UI Settings >> Categories and click the Add Category button
Specify the name, icon, and color for your category as shown in the following image. You can also use hexadecimal or RGBA value to represent the category color.
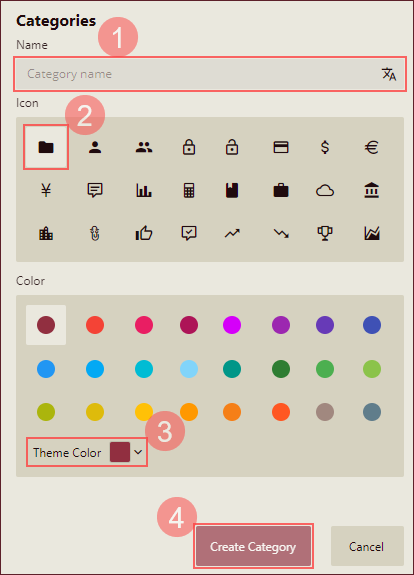
Click the Create Category button to create the category.
To create a sub-category, select an existing category, and click the Add Category button.
To Edit a Category
Navigate to Configuration >> UI Settings >> Categories, select a Category, and click the Edit Category button.
Update the category by modifying its name, icon, or color. In the below example, we changed the category color.
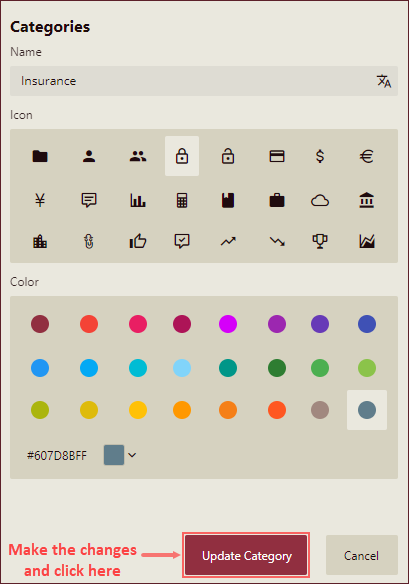
Click the Update Category button to update the settings.
To Delete a Category
Navigate to Configuration > Categories.
Click the delete icon adjacent to the category name. A Delete Category message box appears.
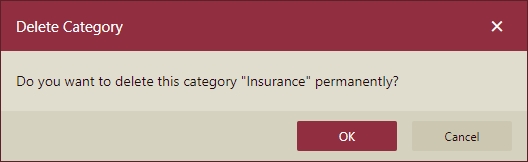
Click OK to confirm the deletion of a category. Deleting a category does not delete the documents in that category. The documents in a deleted category are displayed under No Category in the Document and Resource Portal. Note that the category is deleted permanently.
To move a category up or down in the list, simply drag the category to the desired position.
To Localize Category Name
You can translate the Category name for your users in their native language. To allow users to see the Category name is their native language, you need to do the following,
Set Permissions on Default Language Resource
On the Admin Portal, navigate to Configuration >> UI Settings >> Portal Settings tab.
From the Default Language Resource drop-down, select a language resource to translate the Category name to and click the Save button. See the Add Language Resource article for information on adding language resources in the Wyn Enterprise application.
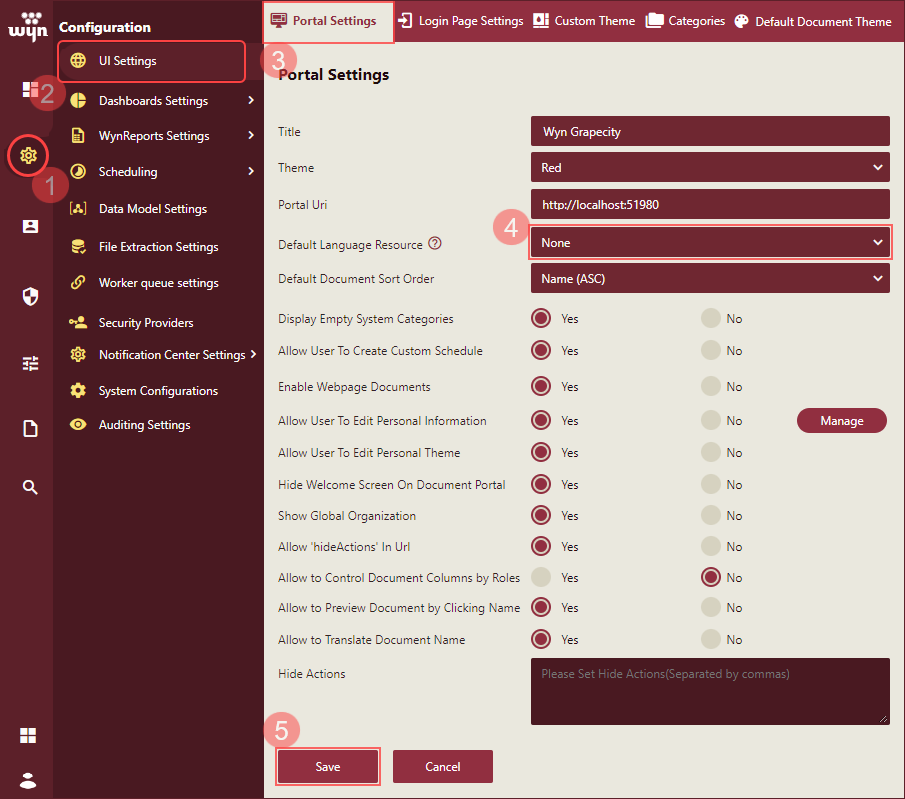
Note: Default Language Resource on the Portal Settings tab is added from the Resource Portal >> + (Create) >> Add Language Resource option.
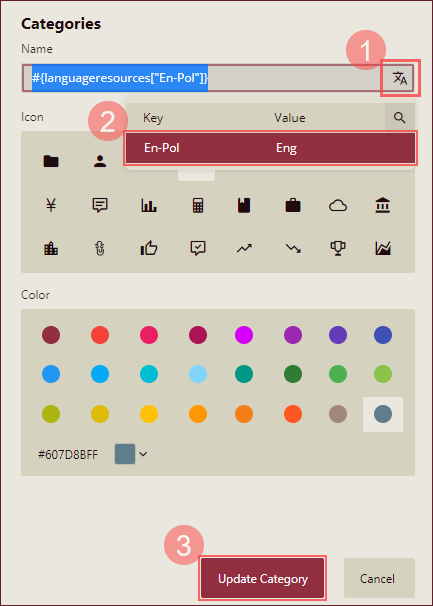
Set Category Localization
Add or edit a Category from the Categories tab.
Select a key of the Default Language Resource using the Language Resource icon. The Category name will be added as an expression which will translate the name to the user's native language as per the selected Default Language Resource on the Portal Settings tab.
Click Save or Update button to apply localization.
Scenarios Where Category Localization Will Not Work
When a Category is created or edited, a ComboBox is provided to select a key of the currently set Default Language Resource. If a key is selected from the ComboBox, the Category name is recorded as an Expression. There are two possible scenarios where localization of the Category name will not work, as described below,
If the user does not have read permission for the Language Resource, the key of the expression (Category name) will be displayed directly.
If the expression's Key is not found in the Default Language Resource, it will not be translated, and the key will be displayed directly.