Users
A user is an entity whose role(s) is assigned by the admin. Based on the assigned role(s), the user gets permission to perform specific actions.
The admin account is also a user account that has the highest permissions and cannot be deleted. An admin can view and edit the account information of all the users such as email, mobile number, status; add, import, delete users, and modify existing users' credentials, passwords, and roles. An organization administrator can also perform these operations in his organization(s) or sub-organizations(s) only if he has the Manage User permission.
All of this can be managed from the User page in the Account section.
Add a User
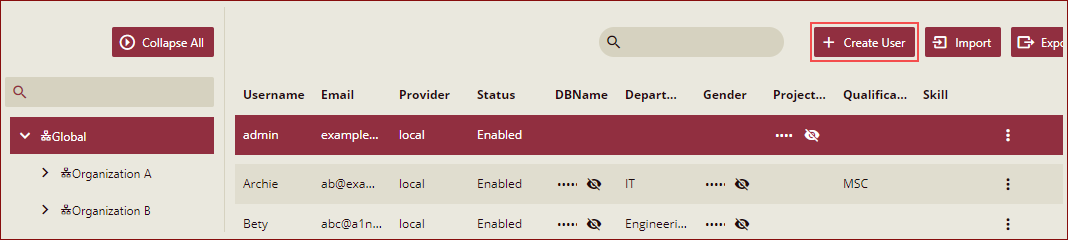
Navigate to Account > Users.
Select the organization from the left panel for which you want to add users, and click the Create User button.
In the Create User pane on the right, enter the user details and fill in all the compulsory fields - Username, Email, and Password.
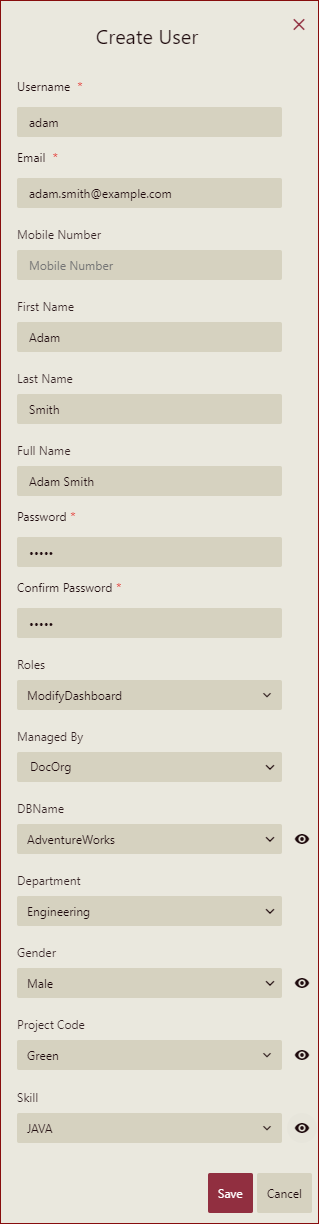
Re-enter the password to confirm it. Select the appropriate Roles and Department for the user from the drop-down lists.
Enter the details of the Custom Properties.
Click Save to save the new user.
Add Multiple Users
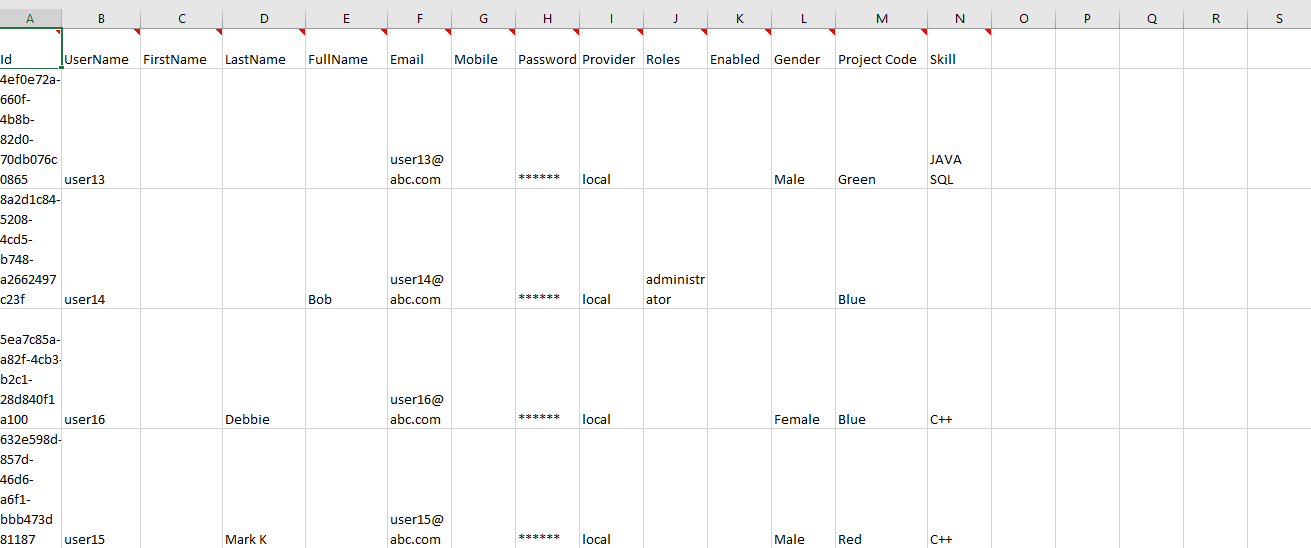
To add multiple users, the following information of each user needs to be entered in an excel file, which later needs to be imported into the Wyn Enterprise portal.
Data Fields | Remarks |
|---|---|
Id | the unique identification for user can be empty if the provider is 'local' |
UserName | the unique user name, cannot be empty |
FirstName | the first name of user |
LastName | the last name of user |
FullName | the full name of user |
the unique email address of the user, cannot be empty | |
Mobile | the unique mobile number of users |
Password | the password of the user, must contain both letter and number, the length should be between 8 and 32, cannot be empty if the provider is 'local' |
Provider | the provider of the user, the default value is 'local', can be empty |
Roles | the roles of user, the roles must be defined before, can be separated by comma ',' |
Enabled | the enable state of the user, can be true or false, the default value is true |
You can import/export the users' information along with their custom properties. Follow these steps to import the user(s) information:
Click the Import button.
Note that you can import users only for the Global organization.
In the Import Users pane on the left, drag and drop or select the excel file that contains users' information.

A message of successful or unsuccessful import appears. In case of successful import, you will be able to see the added users on the User page. In case of failure, it might be possible that:
A required user data field (User name, Email, or Password) is not specified.
The email data field is not in a valid email format.
The user is already registered with the same name or email address.
The Export Template button lets you download the users' information in an excel file.
Export/Import Custom Properties
The custom properties will be listed in the Excel file when downloading the user-importing template, the available values will be shown in the cell's description.
The custom properties value will also be exported when exporting users, with one value per line for the multivalued custom properties.
When importing users, the custom properties will also be imported if available.
The import will fail in the following conditions:
The custom property listed in the Excel file does not exist.
The value of the custom property provided does not match any one of the custom property's available values.
Example: Below is an example to explain the details of exporting/importing custom properties.
Here we have taken 3 custom properties named Gender, Project Code, and Skill.

On the Users tab, click the Export button to export users.

All the custom properties will also be exported.
If you want to import users, then download the Export Template first. In the template, all the custom properties will be listed.

Now import any data. Here we are importing the following users: Alice and Robin.

If the information is not correct in the template, then an error message will be displayed.
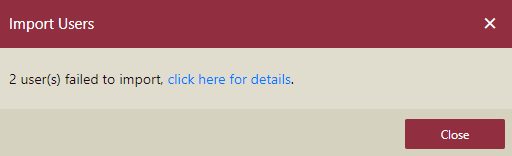
Click the link click here for detail, to get detailed information about the import failure.
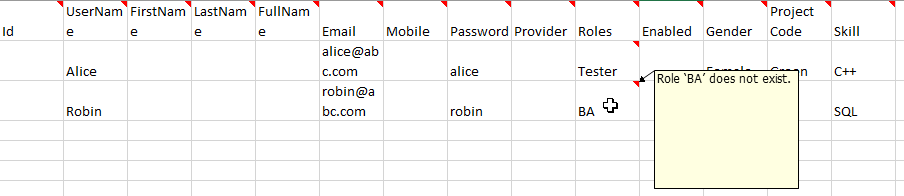
So, now edit the Roles and again import the file.

The Import Users message box is displayed.
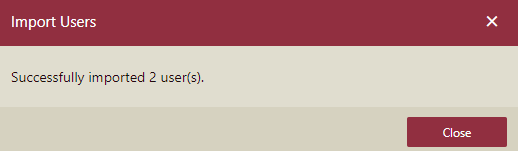
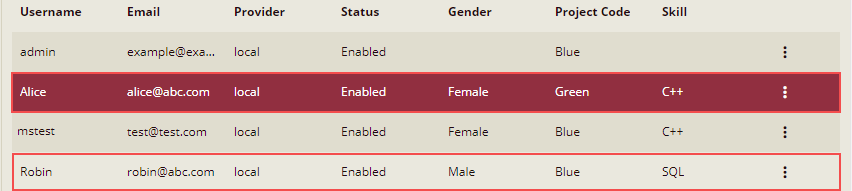
So, users are successfully imported with their custom properties.
Note: You can only import the custom properties while importing the new users and cannot update the existing user's custom properties values.
Modify a User
Navigate to Account > Users.
Select the user from the right panel and from the vertical ellipses
 next to the user you want to modify, click Edit, Enable or Disable a user, or Delete the user from the database.
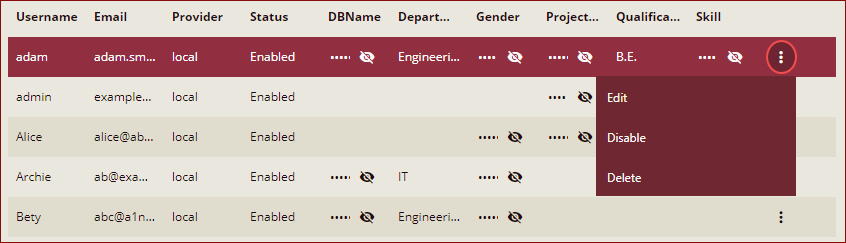
Select Edit to edit the user details.
Click Save.
Limit Organization Members Visibility
You can limit the organization members visibility while adding the users to an organization by setting the Limit Organization Members Visibility property in the Configuration->UI Settings->Portal settings page to Yes.
For the organization admin, all the users in the top-level organization (including the users in the sub-organizations) are available when adding users to an organization.
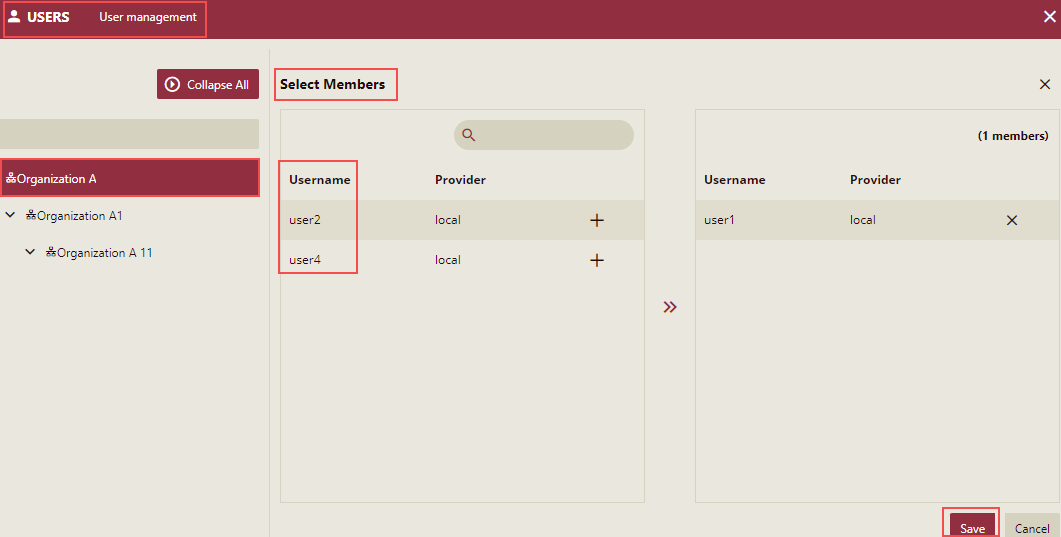
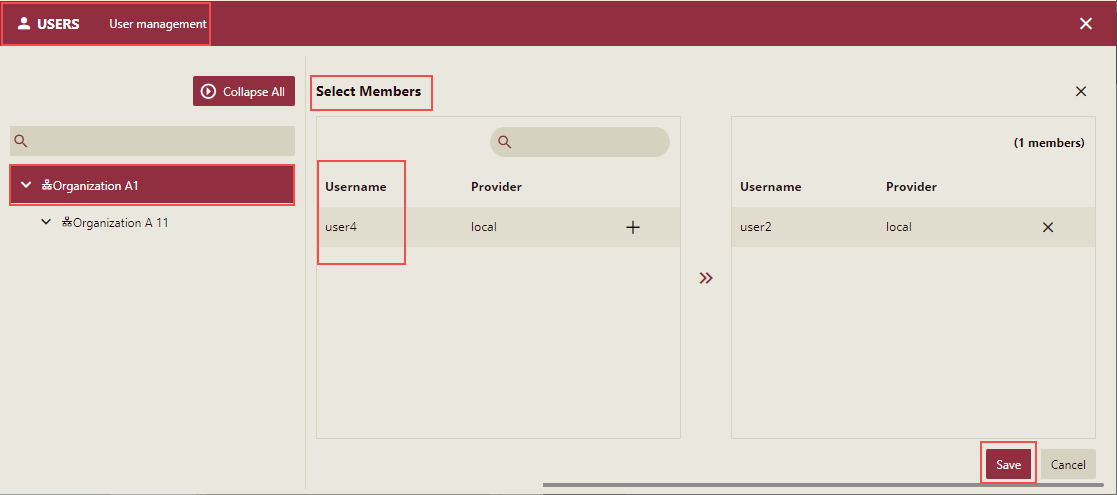
Scenario 1: All organizations have unique users
Example: In this example, we are taking 3 Organizations A, A 1, and A 11; the table below shows their relationship.
Organization | User | Sub-organization Of | User Role |
|---|---|---|---|
Organization A | user1 | Organization Administrator | |
Organization A1 | user2 | A | Organization Administrator |
Organization A11 | user4 | A1 | Oragnization Administrator |
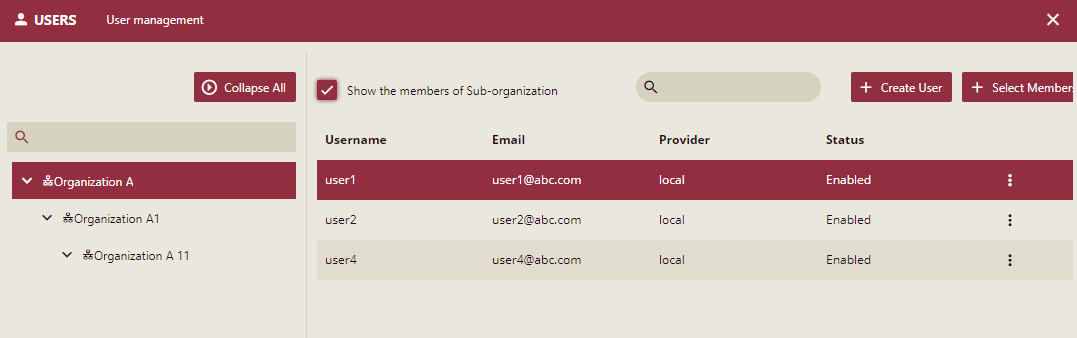
When user1 (org admin) is logged in to the Organization A, and wants to add users to the Organization A,then all the users of it's sub-organizations (A1 and A11) will be visible.
Similarly, when user2 (org admin) is logged in to the Organization A1, and wants to add users to the Organization A1,then only the users of it's suborganizations (A11) will be visible. So, here user2 can only see user4.
Note: If the Limit Organization Members Visibility property in the Configuration->UI Settings->Portal settings page is set to No, then for the organization admin, all users in the system are available when adding users to a specific organization/role.
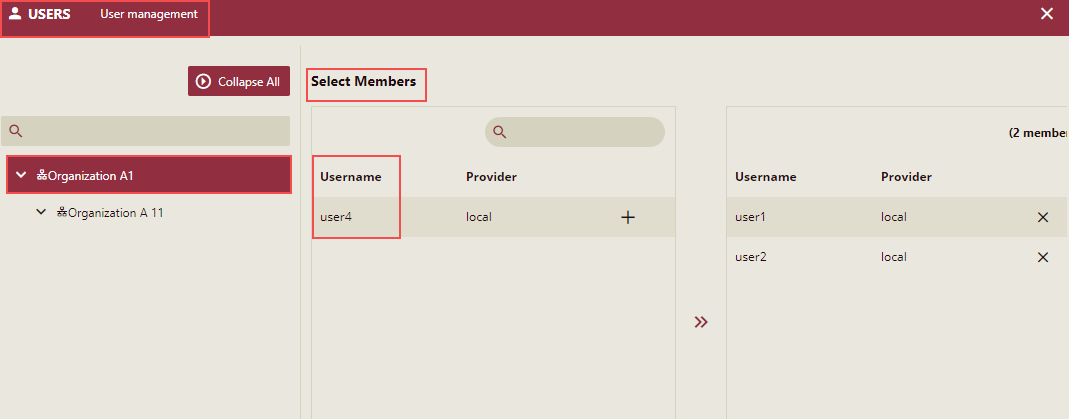
Scenario 2: Single user in multiple organizations
Example: In this example, there are 3 organizations A, A1 and A11 and user1 is part of Organizations A and A 1.
Organization | User | Sub-organization Of | User Role |
|---|---|---|---|
Organization A | user1 | Organization Administrator | |
Organization A1 | user1, user2 | A | Organization Administrator |
Organization A11 | user4 | A1 | Organization Administrator |

When user1 (org admin) is logged in to the Organization A1, and wants to add users to the Organization A1,then only the users of it's suborganization(s) (A11) will be visible. Although the user1 is part of Organization A and Organization A1, still users of Organization A will not be visible in this scenario.
Note: For the Global Admin, all users in the system are visible when adding users to a specific organization/role.